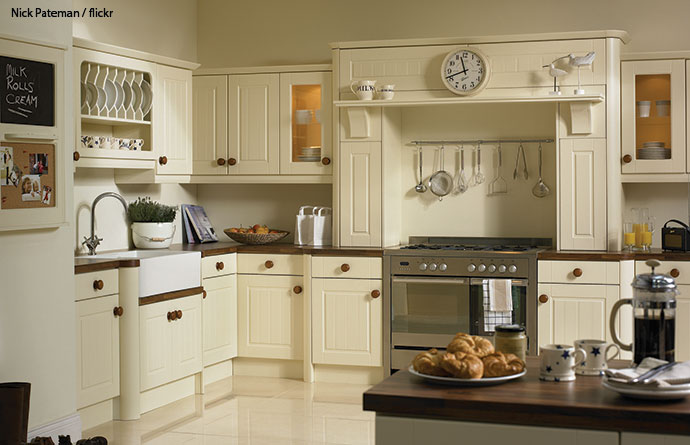
If there is one room in the home that will fill you with dread when packing for a home move, then it has to be the kitchen.
Packing a kitchen up ready to move poses a whole host of problems.
Usually, every cupboard and drawer is often filled to capacity, there are so many different sized and shaped objects, there are breakables and plastics, heavy pots and pans, and of course some very large and heavy appliances.
Not only does all this need sorting and packing, but you will still need the kitchen to be a functioning workspace at the same time.
If you plan on packing your kitchen yourself, then you will have to expect some inconvenience and the fact that you may be living on fast food, or premade meals (if you are really organised), for a few days.
But read on, because this epic guide to packing your kitchen for moving will take you through every step of the process, making it easier and less stressful for you.
Don’t forget to bookmark this page so that you can keep coming back to get packing tips on every stage of your kitchen packing marathon.
How Long Does it Take to Pack a Kitchen for Moving?
Far, far, longer than you think.
There are so many variables, how big your kitchen is, how full your cupboards are, and how much time you can devote solely to sorting and packing, that giving an estimate of how long it will take to pack your kitchen is impossible.
Professional packers allow 4 to 6 hours to pack the average kitchen, but this is after all the prep work like decluttering has been done, and does not include cleaning.
It will take you far longer to pack than a professional packing team so allow 2-3 days at least just for packing a small kitchen, allow 5 days for a large kitchen.
You may also like to read: Are Professional Packing Services Worth the Money? Before embarking on your epic packing marathon, read this guide which explains exactly what a professional packing service is, and what exceptional value for money they offer, not to mention how much easier they will make your home move.
Save time and money on your move
Save up to 40% on your upcoming move and get a quote from reputable moving experts.
When Should You Start Packing a Kitchen When Moving Home?
Packing is the worst part of any home move so consider hiring a professional packing team to make your life easier
The rule of thumb when it comes to packing your kitchen is to start the prep work as soon as possible.
As each cupboard or drawer is boxed, you can give them a good clean so that just before moving day all they need is a quick wipeover.
Below is an overview of the stages of packing a kitchen for moving, we will cover the packing details in more depth later.
2 weeks to pack a kitchen may sound like a lot of time, but packing for a move is no easy task. You are better off being ready to go a day early than a day late.
Kitchen Packing Timeline
2 weeks Before Moving Day
You can start a few weeks ahead of the move date by making an inventory of all the part packets of food, ingredients, and bottles of sauces you have.
This way you can plan meals that will use up all the bits and pieces before you move.
Devise your meal plan so that about 2 days before moving day everything is used up. This then gives you time to clean the oven and fridge before they are packed and ready for moving.
Remember that you will also need to empty your freezer so that you can defrost it about 48 hours before your moving date.
Whilst making your inventory you can throw out all the out-of-date things you will come across.
You should also be decluttering now, getting rid of all those things that you have in your kitchen but never use.
You can start to pack all those items that will not be used between now and moving day.
When packing your moving boxes use the rule 1 box to 1 cupboard which will make unpacking so much easier.
Remember to clearly label all of your moving boxes so that you know exactly what is in them. Number them so that if a box is put in the wrong room, or is missing, you will immediately know.
Label the boxes clearly that they should be put in the kitchen of your new home.
You should plan that only the essentials are left to pack 1 week before moving day.
You may also like to read: How to Label Moving Boxes – An Easy and Foolproof Method. In this guide, we share a simple way to label your moving boxes so that you can easily identify which room they go in, and in what order they should be unpacked.
1 Week Before Moving Day
By now you should only have the items left to pack that you know you will be using this week.
If you are running out of ideas as to what meals to make with your remaining ingredients you can use a recipe generator to help you, such as www.supercook.com or www.myfridgefood.com
48 hours before moving day ensure that your fridge and freezer are empty. This gives you time to defrost and clean the freezer and the fridge.
You can now also prepare your larger appliances for wrapping by giving them a good clean.
Plan to have your large kitchen appliances wrapped by the day before moving day.
On the eve before moving day ensure that there is nothing left to pack and that all the cupboards and drawers have been cleaned.
Remember to keep things like a kettle, tea, and coffee out for moving day (these can be packed in your essential moving day box).
Essential to have: Week-By-Week Home Moving Calendar and Checklist. This invaluable tool logs every home move task that you need to do, and sets them out in chronological order so that you move home in the most efficient and cost-effective way.
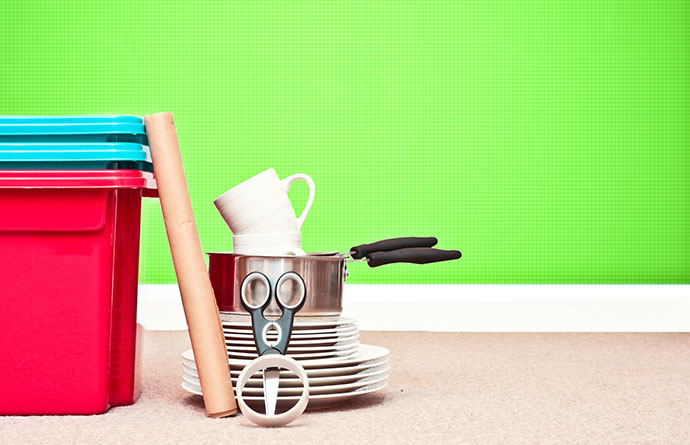
Kitchen Packing Supply Checklist
Plastic crates are great for packing and moving especially if you need to store things for a while
Judging how much packing material you will need is quite difficult and will depend upon how much stuff you have in your kitchen.
In the packing sections later we will cover packing techniques and how to make the most efficient use of the space in each box, but however many boxes you think you will need, get at least 50% more.
Here is a list of the packing supplies you will need when packing your kitchen.
Twinned walled moving boxes
Good quality packing tape
Bubble wrap
Packing paper
Shrink wrap
Ziplock bags
Marker pens
If space allows, create a packing station on the work surface for example as this will make packing so much easier.
Use your oven gloves and tea towels to pad out gaps in your moving boxes or to wrap fragile items, which will save you some money on bubble wrap.
Remember always to pack with unpacking in mind. The better you pack and label your moving boxes, the easier it will make the unpacking.
It may be that you currently keep your cutlery in the kitchen, but you will keep it in the dining room in your new home, so bear that in mind when packing.
You may want to pack the cutlery into their own box rather than in a kitchen box so that you do not have to move things between rooms at your new home. And of course, you will label it dining room rather than the kitchen.
Little things like this will make unpacking nowhere near as overwhelming as it will be if you do not take the time and effort to pack thoughtfully.
Read on now to find out the best way to pack your kitchen for moving.
It does not really matter what you use to wrap the blades of your knives as long as they are totally covered to prevent any nasty accidents.
In our example here we will use packing paper but you could use old towels or t-shirts.
Stack about 3-4 sheets of packing paper flat on your packing station.
#2 Group Knives into Similar Sizes
Sort your knives into groups of similar lengths, about 5 knives to each group. This will make the wrapping process easier.
If you have large, expensive, or uniquely shaped knives then they will be packed individually.
#3 Roll and Wrap Each Knife
Now you need to roll each knife in packing paper so that it is totally enveloped, then add the next knife and roll again, and so on and so on until your 5 knives are individually wrapped but within one bundle.
#4 Secure the Bundle of Knives
Now tape the bundle together to stop it from unraveling. Put an extra length of tape over the tip of the knives as an added level of protection and to stop them from slipping out of the bundle.
#5 Add a Layer of Bubble Wrap
Now take the entire bundle and cover it in a couple of layers of bubble wrap then tape it securely.
#6 Label Your Knife Bundle
If you will not be unpacking all your knives straightaway then label the knives as to what type of knife they are, paring knives for example.
#7 Place into a Moving Box
Take a small moving box and line it with bubble wrap or scrunched-up newspaper to create a bed for the bundles of knives to lay upon.
Once all your bundles of knives are within the box, fill any spaces with packing materials so that the bundles cannot move about inside the box.
Put an extra layer of protection on the top before sealing the box shut.
#8 Label the Moving Box
Clearly label the box that it contains kitchen knives, and that there are sharp objects within the box, and mark that the box should be placed in the kitchen at your new home.
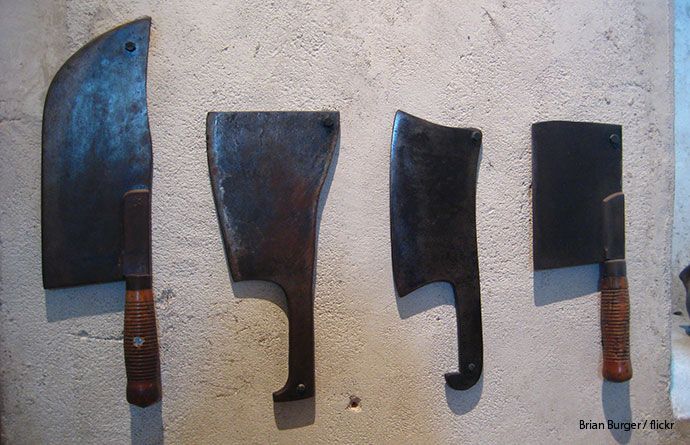
How to Pack Large Kitchen Knives for Moving Home
Large knives need to be packed individually
If you own large, or uniquely shaped kitchen knives, they should be wrapped individually.
You could use the same packing method as you used above, but for heavy and very sharp knives it is best to use the following packing method.
#1 Protect the Knife Blade
Find a piece of wood that measures slightly larger than the knife blade. Alternatively cut several pieces of thick cardboard twice the size of the knife.
#2 Sheath the Blade
Using masking tape so that it does not mark the blade, tape the blade securely to the block of wood ensuring the sharp edge is a few millimeters away from the edge of the wood.
Alternatively, create a sheath from the pieces of cardboard by folding it in half and taping the open edge. Then slip the knife into the sheath.
#3 Cover in Bubble Wrap
Now wrap the knife in several layers of bubble wrap creating a well-cushioned bundle.
Then seal the bundle in packing tape.
#4 Place in a Moving Box
You can now put this bundle into your box with your other knives, or if you have an extensive collection of large knives, then pack them into their own well-padded box.
#5 Label the Moving Box
Clearly label that the box contains knives and should be placed in the kitchen at your new home.
How to Pack a Knife Block for Moving Home
#1 Secure the Knives
Create tubes of packing paper or bubble wrap and slip them between each knife so that the handles cannot touch each other and get marked.
Wrap the entire block in bubble wrap, then tape across the block top to bottom in both directions creating a cross shape. This will securely hold the knives in position within the block.
Alternatively, using masking tape so that neither the knives nor the block gets marked, secure each knife into the block. Then wrap in bubble wrap.
#2 Wrap in Bubble Wrap
Now cover the entire block/knife package in several layers of bubble wrap and secure it with packing tape. Pay particular attention to the corners of the knife block ensuring they are very well protected.
#3 Place in Moving Box
Now you can place the wrapped knife block into a box along with your other knives.
How to Pack Cutlery When Moving Home
Group like-for-like cutlery when packing them without a cutlery tray
How you usually store your cutlery, and whether it is stainless steel or real silver, will dictate which packing method you use, but they are all fairly simple.
How to Pack Cutlery in a Tray for Moving Home
If you store your stainless steel cutlery in a utensil tray then it is easy to pack them for moving.
#1 Remove the cutlery from the tray
#2 Clean and thoroughly dry both the cutlery and the tray
#3 Replace the cutlery into its respective place within the utensil tray
#4 Place layers of bubble wrap on top of each receptacle so that the cutlery will not move about in transit.
#5 Wrap the entire tray in several layers of bubble wrap and secure it with tape.
#6 Place into a well-padded moving box along with other items to fill the box.
#7 Fill all available space in the moving box so that the contents cannot move around when being moved.
#8 Clearly label the moving box that it contains cutlery and that the box must be placed in the kitchen at your new home.
How to Pack Loose Cutlery for Moving Home
#1 Clean and thoroughly dry your cutlery
#2 Lay 2-3 sheets of packing paper flat out on a flat surface
#3 Sort your cutlery so that you group like for like together
#4 Create Bundles by placing the cutlery facing the same way, so all the spoons will fit bowl to bowl, handle to handle for example.
#5 Roll each bundle of cutlery in packing paper to create tight packages and secure them with tape
#6 Place each bundle of cutlery into a well-padded moving box
#7 Once the box is filled, ensure that the contents cannot move about by filling any gaps with bubble wrap.
#8 Seal and label the box, clearly marking which room it is to be placed in within your new home.
How to Pack Silverware for Moving Home
If you own solid silver cutlery then it is likely already in its own protective case, so it is simply a case of
#1 Add a few sheets of packing paper inside the lid to add a further layer of protection.
#2 Wrap the cutlery case in several layers of bubble wrap and secure it with packing tape.
#3 Place into a well-padded moving box, filling any gaps with padding to ensure that the case cannot move about within the box as it is being moved.
#4 Label as fragile, what the contents of the box are, and the room that it is destined for in your new home.
How to Pack Individual Pieces of Silverware
#1 Clean, dry, and polish your silverware
#2 Lay out sheets of soft tissue paper on a flat surface
#3 Roll each individual piece of silverware in the soft tissue
#4 Pad well a small moving box with bubble wrap or soft tissue
#5 Place each piece of cutlery into the padded box ensuring that they cannot move about within the box
#6 If layering the cutlery within the box add padding between each layer and a final layer on the top before closing the box.
#7 Seal and label the box clearly marking what the contents are and which room they are to be placed in within your new home.
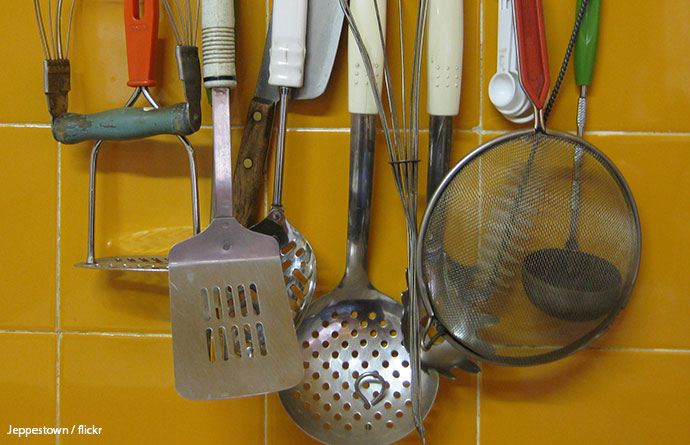
How to Pack Kitchen Utensils When Moving Home
Utensils are quite easy to pack
#1 Group your utensils
Group all your utensils together, like for like, and of similar sizes.
#2 Create Bundles
Utensils that are made of materials that will not rub and damage each other during the move, such as wood or plastic, can just be wrapped in groups.
So all your wooden spatulas or spoons can be wrapped together, and ladles can be stacked inside each other and wrapped.
If your utensils are stainless steel you will want to wrap each individual piece in packing paper or bubble wrap to protect their finish.
#3 Place in a Moving Box
Depending upon how many utensils you have, you can then place them in their own dedicated box or use them as fillers in other boxes.
Ensure that they are well protected within the boxes and cannot move around within the box as they are moved.
#4 Seal and Label
Then securely seal and label the box so that you know what the contents are and which room they should go into at your new home.
If your utensils are kept in a tray then you can simply lay a layer of bubble wrap so that the utensils cannot move around and then shrink-wrap the whole thing before placing it in a moving box.
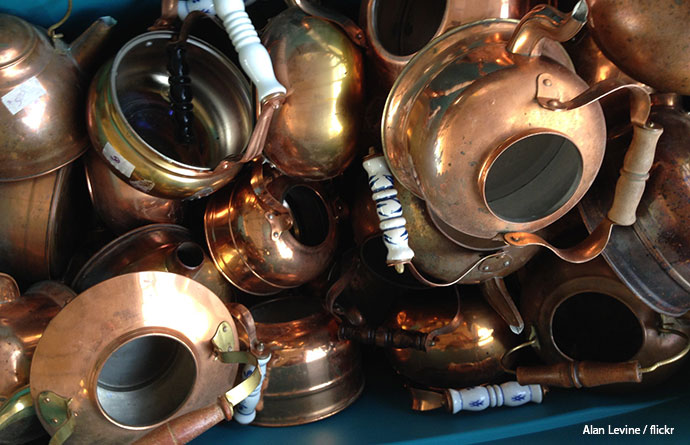
How to Pack Pots and Pans When Moving Home
Declutter before you start packing your pots and pans, it will make packing cheaper and easier
We are going to pack the pots and pans inside each other, Russian doll style.
This will not only save packing materials but space in the removal van, as well as help to protect each pot and pan.
Every alternate pot is wrapped inside and out, protecting itself and the next pot from damage.
Here is how to pack pots and pans for moving:
#1 Clean and thoroughly dry each pot and its lid.
#2 Wrap the largest pot you have in bubble wrap both inside and out.
#3 Place the next-sized down pot within the larger one.
#4 Wrap the next, smaller pot, in bubble wrap both inside and out.
#5 Potlids should be wrapped individually in bubble wrap.
#6 Place the pots in a well-padded moving box. Use a small or medium-sized box as pots and pans can be heavy, especially if they are copper-bottomed or steel.
#7 Slip the lids in any gaps in the box and pad all the gaps so that the pots are not only well protected but cannot move about in transit.
How to Pack Heavy and Large Pots and Pans for Moving
Some pots and pans can be extremely large and heavy and do not lend well to the nesting pots’ method of packing.
It is important that you do not make your moving boxes too heavy for health and safety reasons, so if you have large cast iron pots and pans you may only want to pack one or two to a box.
You can still make use of the remaining space in the moving boxes by packing dried foods, or lighter items such as tea towels, within the boxes.
Although cast iron pots and pans are extremely durable, you will want to protect their finish with a good layer of bubble wrap before placing them into the moving box.
When packing cast iron pots and pans be sure that they cannot move about within the moving box by padding any gaps or filling with lighter items.
And a final tip. Ensure your cast iron pots and pans are totally dry when packing them or you will find that they will be going rusty when it comes to unpacking them.
Protect them with bubble wrap then slip them inside each other to save space in the boxes
There is a huge variety of serving and cooking dishes found in the average kitchen, but the following packing tips should cover any type of Pyrex or ceramic kitchen dish you may have.
As with pots and pans, kitchen dishes can soon become extremely heavy so use only small and medium-sized moving boxes, and be very mindful of how much the box will weigh when it is finished.
#1 Clean and Dry Your Dishes
#2 Lay out a stack of wrapping paper on a flat surface
#3 Place the dish in the centre of the sheet of wrapping paper and fold over the wrapping paper to totally envelop the item.
#4 Wrap the dish in a couple of layers of bubble wrap and secure it with packing tape
#5 Place the wrapped dish into a well-padded moving box.
#6 If weight permits, place a slightly smaller wrapped dish inside the larger one or fill the moving box with Tupperware or lighter objects.
#7 Fill any gaps in the box with padding to ensure that the dishes cannot move about within the box as they are moved.
#8 Seal and label the box marking that the contents are fragile, handle with care, what the box contains, and which room it should be placed in within the new home.
This is how your fridge should look a few days before you move home
In an ideal world, you will be moving home with no part packets of food, and certainly no fresh or frozen food.
If you are moving long-distance then you will certainly want to have used up all your fresh and frozen food before moving day. But should you still have some left then maybe you could consider donating it to your local food bank or friends and family.
In most cases, it is often more expensive to pack and ship food than it is to replace it when you get to your destination.
But if you are just moving a short distance, having to move at very short notice, or moving yourself, then you may find yourself wanting to know about packing food when moving home.
Any home move can be subject to delays, and frozen food especially will be ruined after a few hours out of the freezer. It is always best to try and move home without any frozen food.
Food that normally lives in the fridge should be fine to transport but try to keep the amount of food being moved to an absolute minimum.
#1 Refrigerated Foods
For short-distance moves then an icebox or cooler bag should be enough to keep your normally refrigerated food safe.
Place the food within zip-lock bags before placing it into the cool bag which will stop any leakages should they occur.
#2 Jars and Cans
Jars and cans should be put into small and medium-sized moving boxes as they soon get extremely heavy.
If moving jars then wrap each one in bubble wrap to help prevent breakages.
Ensure that the moving box is lined with a very thick refuge sack which will help stop any other items from getting damaged should a jar break. The box should be well padded on every side so that there is absolutely no movement within the box.
#3 Packets
When moving packets of dried food, spices, or other foodstuffs, ensure that the packets are sealed with an elastic band or food tie before they are put inside zip lock bags, which are then packed into a box. Should any of the packets split during the move then nothing else will get damaged.
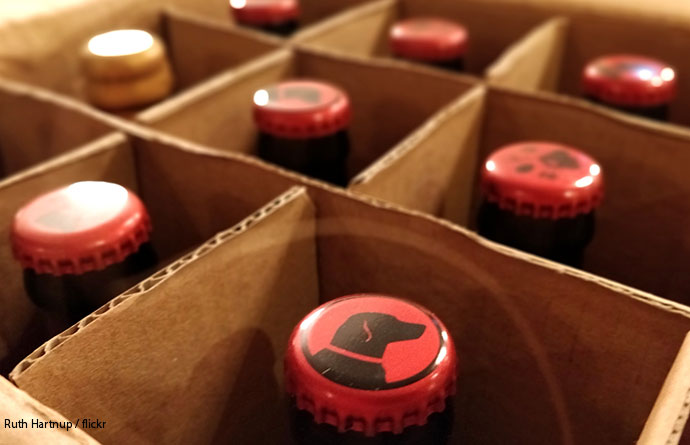
How to Pack Bottles for Moving Home
Boxes with bottle dividers are perfect if you can salvage some from the local supermarket
It is best if you never try to move home with opened bottles of any liquid, the risk of spillage and damage to your other items is just too great.
So half-empty bottles of ketchup you are better off giving away, half-used bottles of oil can be given to family and friends, and half bottles of alcohol……well, you should drink those to be on the safe side!
If you can get bottle boxes from your local grocery store or off-licence then they will be perfect for moving any bottles you have, as long as they are in good condition.
Alternatively, you will need to wrap each bottle in packing paper or bubble wrap and place it inside a well-padded moving box.
Only use small moving boxes for bottles as they are safer to handle and stack more easily.
Ensure the moving boxes are at least double-walled so that they can withstand the weight of the bottles.
Fill any gaps between the bottles with padding to ensure that they cannot move against each other when being moved.
Double tape the top and bottom of the moving box and clearly label that the contents are glass, and fragile, and which room they must go into at your new home.
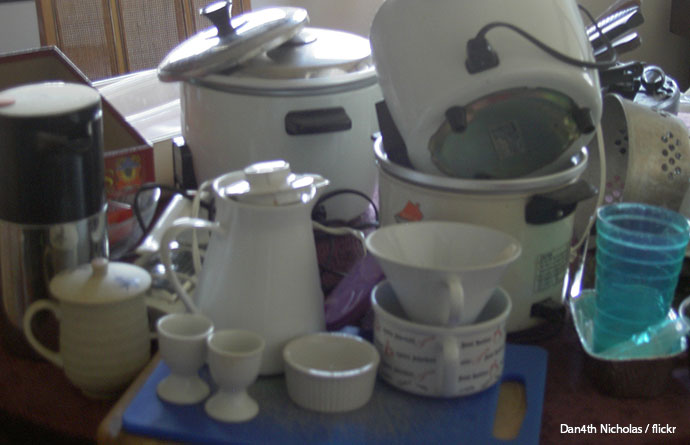
How to Pack Small Kitchen Appliances for Moving Home
Clear out all your unused and broken appliances. There is no point wasting time and money taking them with you
Ideally, you will want to pack your toaster, bread machine, coffee machine, juicer, and mixer in their original packaging, but more likely than not you got rid of those long ago.
The following packing tips will work for any small kitchen appliance, you will just need to choose an appropriately sized box to fit the appliance into.
#1 Clean and Dry
Thoroughly clean and dry your appliances before packing them.
#2 Secure Moving Parts
If the appliance has any parts that could move during transit like lids or trays, tape them securely in place with masking tape, which will not leave marks on the appliance when removed, or cocoon the entire appliance in shrink wrap.
#3 Wrap in Bubble Wrap
Wrap several layers of bubble wrap around the whole appliance and secure it with packing tape.
#4 Box and Label
Place the whole package into a strong box that you have padded on all sides.
Fill any gaps within the box with packing materials so that nothing can move around inside the box.
Add an extra layer of padding on the top before sealing the lid closed.
Label the moving box as fragile, this way up, the contents, and which room you would like it placed in at your new home.
How to Pack Large Kitchen Appliances for Moving Home
Before packing large kitchen appliances like cookers and washing machines you may have to get a licenced engineer to disconnect them from the gas or electricity supply.
Never attempt to disconnect a gas appliance or an appliance wired directly to the mains unless you are legally qualified to do so.
So, assuming that your appliance is now safely disconnected, it is time to pack it ready for moving.
It is always worth photographing your appliances to prove their condition when they are packed in the event that they get damaged and you need to make an insurance claim.
#1 Clean the Appliance Ready for Packing
#2 Secure Hoses / Cables
Remove or secure any cables or hoses from the appliance. Tape any power cords to the appliance with masking tape so that no residue is left when the tape is removed.
If you remove any hoses then they can be put into a ziplock bag and placed within the machine.
Secure a bag over the end of any hoses you disconnect so that any washers in the connecting taps do not get lost.
Secure washing machine drums with transit bolts.
#3 Secure any Loose Accessories
Tape things like oven shelves securely in place so that they cannot move. Wrap the edge of the shelf that faces the oven door in bubble wrap to prevent any damage to the door when it is moved.
Remove any shelves from things like fridges that you cannot secure in position and wrap them separately.
#4 Shrink Wrap the Appliance
Wrap the appliance in shrink wrap. This will not only prevent any doors from opening but will help protect the surface of the appliance from abrasions.
#5 Wrap in Moving Blankets
Wrap the appliance in furniture blankets that will protect it when it is being moved. You can also wrap it in cardboard as an extra layer of protection and secure it in place with packing tape.
Must read: For more comprehensive instructions on how to pack large kitchen appliances please read these guides.
Wipes are the safest cleaning supplies to take to your new home
You will need access to basic cleaning materials on moving day so that you can give your old home a final wipe-over, but you will need a more comprehensive cleaning kit when you arrive at your new home.
Most people choose to take a cleaning kit with them in the car rather than load a box of cleaning materials onto the removal van which is dangerous to your other possessions.
It is often far safer to use up or leave your half-finished bottles of cleaning fluids than move them to your new home.
NOTE: You may invalidate your moving insurance if you put a box of cleaning materials on the removal van that then leaks and damages your other possessions.
#1 Line your moving box with an extra thick rubbish sack so that any spills are contained within the box
#2 Place masking tape over or around the lids of any bottles with caps
#3 Place each cleaning fluid bottle into a Ziploc bag
#4 Fill the box so the products cannot move about in transit and pad any gaps as required.
#5 Seal and label the box very clearly that it is cleaning materials and should not be loaded on the removal van.
You may also like to read: How to Deep Clean a House When Moving Home in which we cover the most efficient ways to clean your home when moving in and out. The guide also includes some recipes for eco-friendly cleaning products so that you can have a super clean home whilst being kind to the planet.
As you by now have no doubt realised, packing a kitchen for moving is an epic task that will take not only a long time but a lot of resources.
You may be considering if it is worth the hard work and stress of doing it yourself, in which case you can get a free no-obligation cost quote from some of the best removal companies in the country to do it for you, in just a couple of minutes.
Must read: The Pros and Cons of Every Home Moving Option. If you are undecided about how you would like to move home, and which is the best option for you, we look at every home moving option so that you can make a more informed decision.
We also have a whole library of award-winning guides and tips created to ensure that your home move is as stress-free and cheap as possible, so be sure to take the time to browse through them.
Good luck with your home move and please comment below if you have any kitchen packing tips that others will find useful.
*At RemovalReviews we will connect you with a professional moving company. Please note that we may not be affiliated with
and you may be speaking with another licensed provider.
Best removals nearby
We use cookies to optimise your experience.Accept and close or Learn more


Share your thoughts by leaving a comment