The bathroom is probably one of the easiest rooms to pack in your home, but nonetheless, some useful bathroom packing tips are worth following.
The bathroom is normally the final room to be packed as you will use it constantly right up until moving day.
But if you have ensuites or a second bathroom, you could get those packed up in the days before you move.
You will want to thoroughly clean your bathroom after it is packed, so leaving just one bathroom to deal with will save any last-minute rushing around on moving day.
Every room in your home has specific items that require unique packing strategies, and the contents of your bathroom pose some risks to other items you are moving, mainly because there are so many liquids found in the bathroom.
So in this week’s home moving blog, we will go through all the items you might find in a typical bathroom, and show you the best, and safest, way to pack them.
Bathroom Packing Supplies Checklist
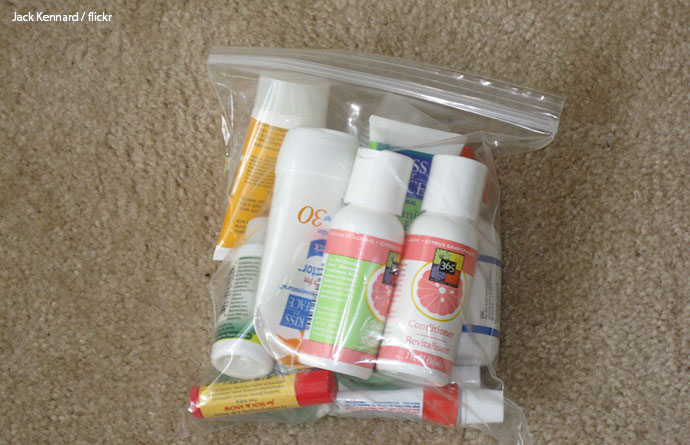
Ziplock bags are indispensable when packing your bathroom for a move
To safely pack the contents of your bathroom for moving you will need the following packing materials:
Small packing boxes
Bubble wrap
Ziploc bags
Masking tape
Shrink Wrap
Heavy-duty refuse sacks
Good quality packing tape
Marker pens
Note: It is a good idea to use a plastic tote box to pack your toiletries and other liquids into rather than a cardboard box. If there are any spillages from the items within, then the spillage will be contained within the plastic box and will not damage any of your other possessions.
Why not make use of your Tupperware boxes from the kitchen, you will save packing space and they will cost you nothing.
Save time and money on your move
Save up to 40% on your upcoming move and get a quote from reputable moving experts.
A few bathroom comforts in your essentials bag will make the first night in your new home so much better
Especially if you are moving long-distance, or over several days, you will need to pack a bathroom essentials bag.
Decide what you will put in this bag before you start any other bathroom packing, otherwise, you may find yourself searching through boxes that you have already packed looking for a specific item.
Your bathroom essentials bag will hold all the absolutely essential items that you need access to on moving day, the first night in your new home, and maybe even the next day.
This bag must be kept with you and not be put into the removal van so that you have easy access to it.
These are the bathroom items typically found in an essential item moving bag:
Toilet rolls
Toothbrushes and paste
Wet wipes
Sanitary towels
Deodorant
Shampoo and conditioner
Shower gel
Towels
Hairbrush/comb
Any daily medication
Ensure that each item that has the potential to leak, such as shower gel, is packed as per the instructions later in this guide to prevent damage to other items in your essentials bag.
Many people choose to take travel-sized toiletries with them in their essentials bag rather than family-sized bottles of shampoo or shower gel.
These are lighter and easier to take with you and the entire group of toiletries can be safely put into one large Ziploc bag.
It is not usually worth taking things such as toilet brushes or shower curtains with you to your new home as most people would replace these with new ones.
You may also like to read: How to Prepare Your Open First Box in which we offer some suggestions for things that you might want to include in your moving day essentials box.
Bathroom Items Your Removal Company Cannot Move
Although it is not recommended to try and transport any liquids to your new home in the removal van because of the danger of leaks, there are also very specific items that must not go onto the removal van for health and safety reasons.
Your removal company will give you a list of the items that they will not transport, but these are likely to include:
Aerosols such as deodorant
Nail polish
Nail polish remover
Cleaning products such as bleach and disinfectant
You may also like to read: How to Pack and Move Items Your Removal Company Can’t. In this guide, we look at the things your removal company cannot move for health and safety reasons and offer tips on the best way to pack and move those items yourself.
How to Pack Perfumes for Moving Home
When a single perfume can cost hundreds of pounds you want to make sure you protect them well during your home move
There are two main reasons why you will want to take extra special care packing your perfume or aftershave, they are expensive and usually come in glass bottles.
So here are some tips for packing fragrances to stop them from getting damaged during your home move.
#1 Declutter Your Perfume Collection
If you have any perfumes that you don’t wear anymore or were gifted to you but you really don’t like, then now is the time to pass them on to someone else.
The fewer items you need to pack and move, the easier and cheaper your home move will be.
#2 Prevent Spillages
To prevent any of your precious perfume from spilling from its bottle, place a length of masking tape around where the cap meets the neck of the bottle and over the cap to stop it from coming off.
Using masking tape will prevent any tape residue from being left on the bottle.
Alternatively, you could shrink-wrap the whole bottle which will not only keep the lid secure but will prevent any damage to the surface of the bottle.
#3 Wrap in Bubble Wrap
Next, completely wrap the bottle in a couple of layers of bubble wrap and secure it with tape.
#4 Place in Moving Box
Select a small box (depending upon the size of your collection this small box can be placed inside a larger one).
Line the box with an extra thick refuse sack as this will help protect the box and your other possessions in the unlikely event of a bottle getting smashed.
If you have some Tupperware boxes in the kitchen you can use these to pack your fragrances into. These are great as they seal well and will contain any spillages that might occur.
Next, cushion the bottom of the box with several layers of bubble wrap or a towel and place the bottles into the box.
Ensure that there is a good layer of protection between each bottle and that they cannot move about within the box.
Add a final layer of padding on the top of the perfumes before sealing the box.
Clearly label the box fragile, glass, this way up, and which room it must be placed in at your new home.
If you have a large collection of fragrances then transporting them in plastic tote boxes is a good alternative to cardboard boxes as any spills will be contained within the box.
#5 Pack Fragrances in With Your Clothes
Alternatively, rather than box your wrapped fragrances, you can nestle them amongst your clothing to save space and keep them safe.
If placed within your clothes, it would be wise to put the perfume bottles, once wrapped in bubble wrap, in a Ziploc bag.
In the very highly unlikely event that there is a leak from the bottle, it will then not damage your clothes.
For an extra layer of protection, you could slip each packed perfume bottle into a thick sock.
You may also like to read: How to Pack Fragile Items for Moving in which we look at various fragile items found around the home and offer the best packing tips for a quick, safe, and easy home move.
How to Pack Toiletries for Moving Home
Sort out all your makeup and toiletries before packing to make your move easier and cheaper
When packing toiletries for moving home the main consideration is to stop liquids leaking from their bottles or tubes and damaging other items.
Separate any toiletries that you will need on moving day, these will go into your moving day essentials box.
#1 Sort Through Your Toiletries
The first task is to go through all your toiletries, getting rid of the items that you do not need or want.
#2 Seal the Lids
Unscrew the caps of any tubes or bottles and put a layer of shrink wrap over the opening of the neck of the bottle. Then screw back on the cap. This will prevent any liquid from escaping.
If you wish, you can then seal the cap with masking tape.
#3 Place in a Ziploc Bag
Next place like-for-like items in a Ziploc bag as an extra precaution against leaks.
#4 Box your Toiletries
It is best to use a plastic tub to pack your toiletries into, such as a Tupperware box or ice cream tub, as it is another layer of protection should any item leak.
Line the tub with bubble wrap and nestle your toiletries into the tub.
If you have no Tupperware or plastic boxes such as ice cream tubs, line a small box with a thick refuse sack before placing the padding in.
Ensure no items can move around inside the box.
Add a layer of padding on top before sealing the box closed. Face flannels or small hand towels can be used for padding instead of bubble wrap.
#5 Use a Toiletry Bag
If you have a toiletry bag, then seal the lids of your toiletries as described above.
Place like-for-like items in Ziploc bags before putting them into the toiletry bag.
Pad the bag so that the items cannot move around within the toiletry bag.
As an extra precaution, you could then put the toiletry bag into another Ziploc bag before packing it into a box along with your other bathroom items.
You may also like to read: Packing Materials for Moving Home in which we look at not only commercially available packing materials but also items that you have around the home that you can use to protect your possessions during a home move and save yourself some money at the same time.
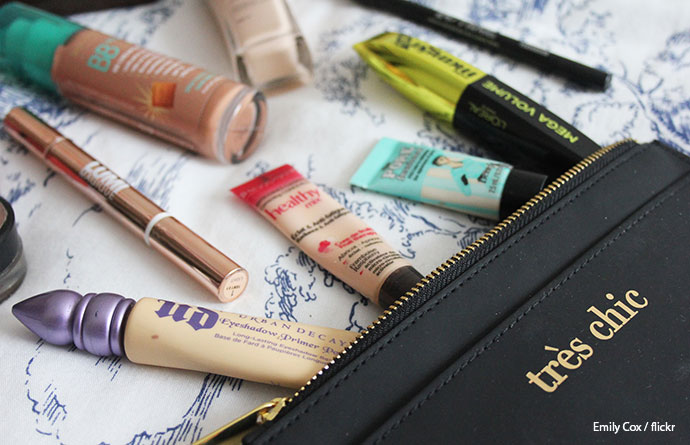
How to Pack Makeup for Moving
When it comes to packing beauty products for moving home, the rule of thumb is never to pack everything all in one bag.
Keep like-for-like items together, so lipsticks in one bag, and nail polish in another.
This way, if there is any damage then not all of your expensive makeup will get ruined.
Don’t forget to keep out your essential everyday makeup that you will need.
#1 Sort Through Your Cosmetics
You are likely to have old makeup, colours you no longer like, and cosmetic products you no longer like. Now is the perfect time to sort through these and get rid of them.
#2 Group Like for Like Items
Once you have sorted through your makeup collection then sort them into like-for-like groups, so all your powders are together for example.
#3 Seal Your Cosmetics Shut
Now seal the lids of each item shut to prevent leaks using masking tape which will not leave a residue when you remove them.
Before sealing just make sure that each lid or cap is tightly closed.
Use shrink wrap to create tight cocoons for each item. This will stop any leaks and also protect the outer from any dirt or scratches.
#4 Bubble Wrap each Item
Next wrap each item in bubble wrap, a face flannel, or other soft material to cushion against any impact that might occur during the move.
#5 Place in Ziploc Bags
Now place each group of padded cosmetics into a Ziploc bag. This is a further layer of protection in the event of a spillage.
#6 Place in Boxes
Place your makeup packs into a well-padded plastic tub.
If you do not have a plastic tub then use a small box that has first been lined with a thick refuse sack before adding the protective padding.
Ensure that none of the contents of the box can move around and that there is a good layer of padding between each bag.
Put a final layer of padding on top of the makeup before closing the lid.
If using a box solely for your makeup then ensure that it is labeled as fragile, this way up, and that it should go into the bathroom at your new home.
If you have a fairly small box of cosmetics then this box can be placed inside a larger box of bathroom items.
You may also like to read: How to Motivate Yourself to Pack for a Home Move. Getting started is often the hardest part, it is easy to get overwhelmed when there is just so much packing to do for a home move. Here we offer some top tips to get you motivated to start your packing.
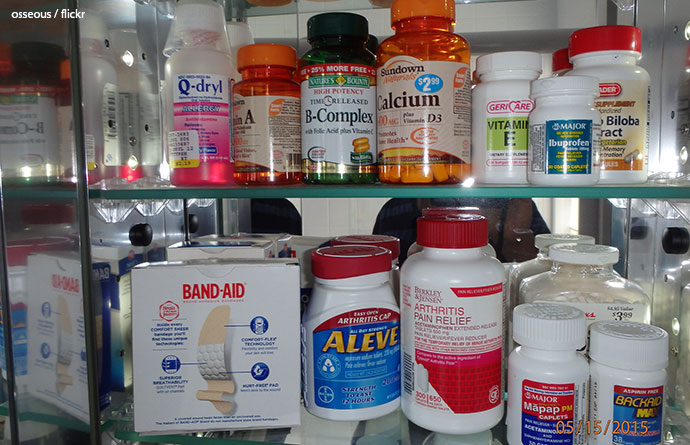
How to Pack Medicines for Moving
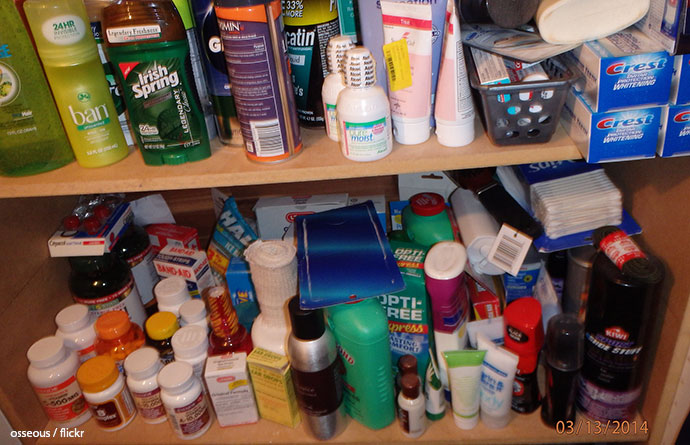
Take any out-of-date drugs to a pharmacy for safe disposal
#1 Sort Out Your Medicine Cabinet
Go through your medicines checking for out-of-date items or items that should not be used having been opened after some time.
Be sure to dispose of the medication safely.
#2 Separate Your Essential Medication
Set aside the medication that you take daily, a pack of headache tablets, and any other medication that you may need on moving day.
These will be packed in your moving day essential box.
#3 Group Like for Like Items
Now group your medicines, like for like, so bottles in one group, tablets in another.
#4 Wrap the Medicine Bottles
First, seal the lids of bottles containing liquid using shrink wrap. Unscrew the cap, cover with shrink wrap, then screw back on the cap. Add a layer of masking tape around the tops as a further precaution against spills.
Next, wrap the bottles in towels, flannels, or bubble wrap to cushion any blows they might get during the move.
#5 Seal in Ziploc Bags
Now put like-for-like items into Ziploc bags and seal them shut.
#6 Place in Boxes
Place the Ziploc bags into a padded plastic tub or into a small box that has been lined with a thick refuse sack.
Ensure that the items cannot move around within the box by adding padding as required.
Put a final layer of padding on top before closing the box.
If you only have a few items of medication then they can be placed within the Ziploc bags and then into one of your other bathroom boxes.
If adding to another box be sure to label the box that it contains your medicines.
You may like to read: How to Label Moving Boxes – An Easy and Foolproof Way. It is essential that you label your moving boxes so that you know which room they belong in at your new home. This method also identifies in which order you should unpack your things making it so much easier to find your essential items for unpacking first.
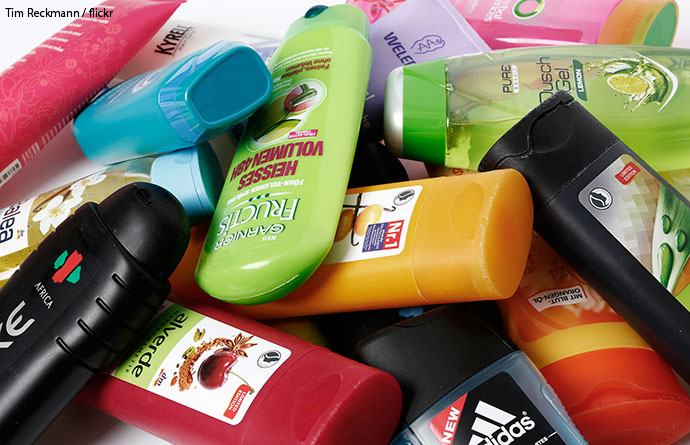
How to Pack Hair Products
It is better to use them up instead of packing them up when moving home
Hair products such as shampoos, conditioners, hair gels, and hair masks are quite hazardous to transport to your new home, so if at all possible try to use them up and replace them with new ones when you get to your new home.
Note that your removal company cannot move aerosols, which means that hair spray must go into your essential moving day box and be moved by yourself to your new home.
The focus when packing hair products is to ensure that they do not leak during transit. The bottles will exert upward pressure when squeezed forcing the liquid out, so the lids must be securely closed and sealed.
#1 Seal the Caps
Clean off any residue of liquid around the caps so that when you seal them, the tape/shrink wrap sticks firmly in place.
Next, place a length of masking tape over and around the cap to seal it shut.
Then wrap the whole bottle in shrink wrap.
#2 Place in Ziploc Bags
Once wrapped, place the bottles into Ziploc bags and close them.
Place tubs of hair gel into a separate Ziploc having sealed the lids closed.
#3 Put in Boxes
Now place the hair products into a box along with your other bathroom items. Ensure that they are well secured in the box from moving around, and also from being impacted by other items in the box.
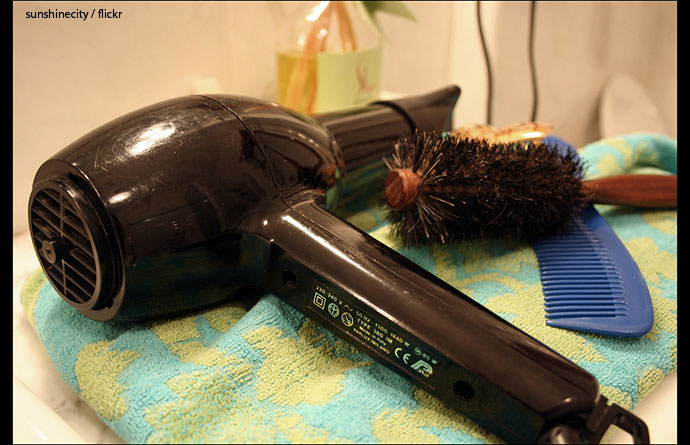
How to Pack a Hairdryer for Moving
Ensure they have totally cooled down before attempting to pack a hairdryer
This section of your bathroom packing guide covers all your electrical items in the bathroom, such as hair dryers, curling tongs, and electric razors.
You will probably be using your hair styling equipment and electric razor right up to and including moving day. So in all likelihood, these will be packed into your bathroom essentials box but you will still need to ensure they are properly wrapped so that they don’t get damaged.
#1 Wrap the Plug
Pay special attention to wrapping the 3-pin plug of your hair styling tools. Wrap them in several layers of bubble wrap, or a flannel, or a face towel so that they cannot cause damage to anything.
#2 Wrap and Protect
Next, wrap the entire hairdryer, styling tongs, etc in bubble wrap or a towel and secure with packing tape. Ensure that the plug is tucked safely into the package you create so that it does not cause damage to the hairdryer or anything else in the packing box.
#3 Place in a Moving Box
Finally, place the wrapped appliance into a box. If you have lots of hairstyling equipment and electric razors then you may want to pack them into their own box.
If so, then pad the box well, ensure the things within the box cannot move around, and place a final layer of protection across the top before sealing the box closed.
Remember to clearly label the box as to what is inside and which room in your new home you want the box placed in.
And just a reminder to ensure that any electrical equipment you are packing is cold before you pack it. Allow plenty of time after using the product for it to cool down before attempting to pack it.
You may also like to read: 12 Space-Saving Packing Tips for a Cheaper Home in which we suggest ways that you can make the most of the space available in each moving box to make your home move as cheap as possible.
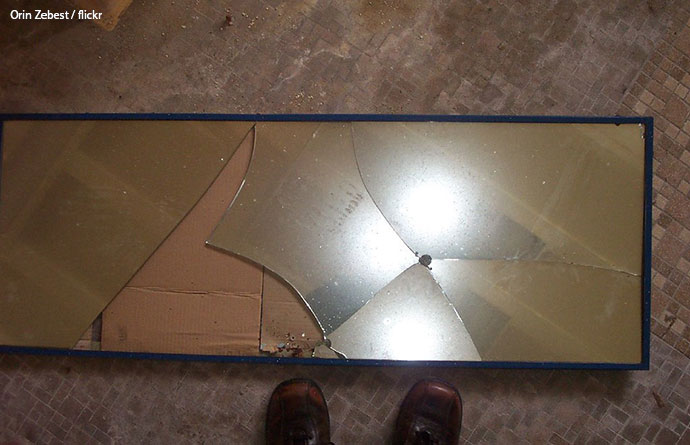
How to Pack Mirrors and Pictures for Moving
Often it makes more sense to leave your bathroom mirror than try to move it to your new home
Many bathroom mirrors have an LED light within them or have a demisting element, so you may need to get a qualified electrician to disconnect the mirror from the mains before packing can begin.
You may also want to consider whether you even want to pack bathroom mirrors and pictures as many people have drilled the wall-hanging fixtures into tiles.
If the mirror or picture hanging fixtures are screwed into the grout, then it is fairly easy to repair once you have taken the mirror or picture down, but you will never repair a drilled tile perfectly.
There is also a high probability that your mirror or pictures will get damaged, either by taking them off the walls or during transit to your new home.
Often it makes far more sense to leave large mirrors and sell them to the new owners or your landlord.
However, if you must take your mirrors and framed artwork with you to your new home, then follow these packing tips.
#1 Clean and Dry Your Mirror and Art Work
Start by thoroughly cleaning the mirror and the glass on the front of your pictures. Ensure it is totally dry or the tape will not stick in the next packing stage.
#2 Mark with an ‘X’
Now take some thick masking tape and create an ‘X’ from corner to corner across the glass.
The theory is that should the mirror or picture get broken during the move then the tape will hold the shards of glass in place and not cause damage to anything else.
#3 Cut out a Cardboard Glass Protector
Cut a piece of cardboard that fits the face of the mirror or picture exactly and use masking tape to secure it in position.
Do not use packing tape as when you remove it you are likely to be left with a residue of glue which is a nightmare to remove.
#4 Wrap in Packing Paper
Place the picture/mirror face up towards you on a pile of packing paper.
Then fold over several sheets of the packing paper to completely envelope the picture/mirror and secure it with tape.
#4 Bubble Wrap
Now cover the entire package with several layers of bubble wrap and secure it with packing tape.
#5 Box and Label
Slip the mirror or picture into a thick cardboard box, just slightly larger than the mirror itself.
Pad the box so that there is no movement within it. When it comes to packing mirrors and pictures you can never put too much protective padding around them.
Finally, clearly mark the box that it contains glass, is very fragile, and that it should be placed in the bathroom at your new home.
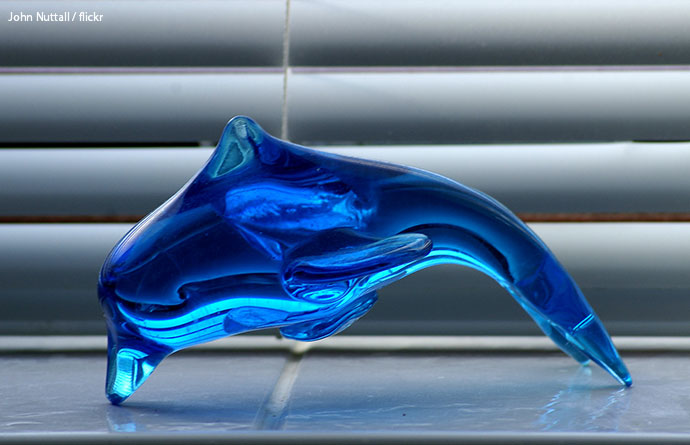
You will have a whale of time packing up all your bathroom ornaments
You may have some ornaments in your bathroom, so you will need some ornament-packing tips to ensure that they arrive in your new home undamaged.
# 1 Decide if You Want to Move Your Ornaments
It may be that the ornaments in your bathroom are outdated, tired, or just not your style anymore. If that is the case then there is no point in wasting your time or money packing and moving them.
So go through your bathroom ornaments and decide if you love them enough to spend your precious time and money taking them to your new home.
#2 Clean and Dry
Now you are left with only the bathroom ornaments that you really love, give them a good clean and thoroughly dry them.
#3 Wrap in Packing Paper
Now wrap each item in packing paper and secure it with a piece of packing tape.
#4 Add Bubble Wrap
Now take the ornament and wrap it in several layers of bubble wrap, securing it in place with packing tape.
#5 Box and Label
If you only have a couple of bathroom ornaments then the packages you have just created can be slipped in the box with your other bathroom items.
If it warrants it, then take a strong moving box and line it with the towels or bubble wrap.
Place the packaged ornaments onto the padding and fill any gaps with more padding so that the ornaments cannot move around inside the box.
Add a final layer of protection on top before closing and sealing the box.
Clearly label the box that the contents are fragile and that the box should be placed in the bathroom at your new home.
You may also like to read: How to Pack Awkward and Odd-Shaped Things. Not all the objects in your home conform to a nice square package so in this packing guide we look at the best ways to pack all those oddly shaped items around your home.
How to Pack Towels for Moving
Towels can be used to pad out the boxes of fragile items that you pack which will save you some money on packing materials.
But if you still have some towels that you need to pack for moving then you can place them into thick refuge sacks.
Roll the towels up, slip them into the thick bin liner, then secure the bag around the towels in a nice tight bundle.
Then when you come to unpack them, the towels will be in rolls and not a jumbled mess.
Towels can also be placed inside your washing machine or suitcases to save on boxes.
You may like to read: Are Home Packing Services Worth the Money? By now you will have seen how much is involved in packing your home for moving and may be asking yourself if there is a better way to move home. There is. Read this guide to find out how.
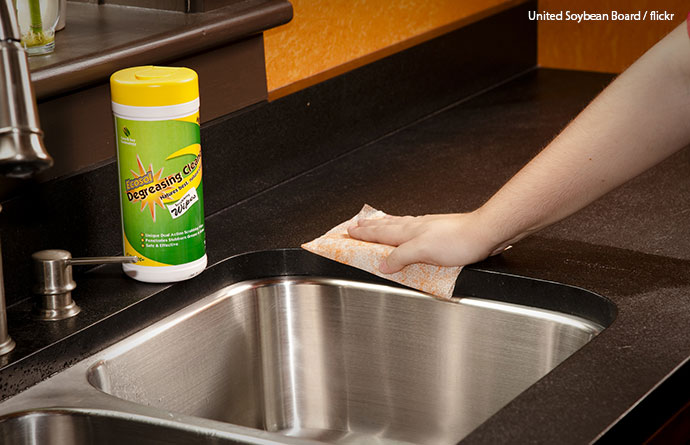
How to Pack Bathroom Cleaning Supplies
Eco-friendly household wipes such as those from United Soybean Board are the safe and easy way to take cleaning supplies to your new home
Ideally, you will have no bathroom cleaning products to move to your new home and will purchase new supplies when you get there.
But time may not allow you to do that, and you will certainly want to clean the bathroom in your new home before you use it.
So, here are some tips on the best way to pack bathroom cleaning products.
Note that your removal company will not move cleaning products for health and safety reasons, so these must travel with you to your new home.
In the run-up to moving day plan your cleaning schedule so that you use up as many cleaning products as possible.
It is just not worth the time and effort to move part bottles of cleaning fluids, so use up whatever you have or just leave them for the next occupiers.
You will definitely want to clean your new bathrooms before you use them so rather than packing liquids and running the risk of spilling bleach on your sofa, here are some cleaning products that take up little space and can safely be moved to your new home:
Sealed packs of disinfectant wipes
Multi-surface wipes
Floor wipes
Toilet disinfectant tablets
Microfibre cloths
Kitchen Towel
Rubber gloves
That should be enough to get the bathrooms disinfected just for your first night’s use. You can then give your new home a full clean the next day.
You may also like to read: How to Deep Clean a House When Moving Home which not only offers you a cleaning schedule for when moving home but some recipes for some eco-friendly cleaning products that actually work.
So, as you can see from these bathroom packing tips, even in the smallest room of the home there is plenty of packing that needs doing.
You may now realise just how much time and effort goes into packing for a home move, and that it makes far more sense to leave this arduous task to the professionals.
Not only will you not have to live amongst moving boxes for weeks on end as you complete your packing marathon, but professional packers will have all the materials they need, will have you packed up in no time, and will make the moving process so much easier.
A full packing service represents excellent value for money.
*At RemovalReviews we will connect you with a professional moving company. Please note that we may not be affiliated with
and you may be speaking with another licensed provider.
Best removals nearby
We use cookies to optimise your experience.Accept and close or Learn more


Share your thoughts by leaving a comment