There are certainly plenty of opportunities for you to practice your packing skills when it comes to packing up your living room for moving.
With such a vast array of different-shaped items to pack in the average living room, it can seem like an overwhelming task. But these packing tips and step-by-step packing instructions will make packing your living room for moving so much easier.
Most people will be using their living room right up until moving day, but there are still plenty of items that you can get packed now, leaving just a few key items to pack at the last moment.
From packing materials, to how to pack a fish tank, if you might find an item in your average living room, then you will find packing tips for that item here in this ultimate guide to packing a living room for moving.
Packing Materials Checklist for Packing a Living Room
Always buy the best quality packing materials that you can, they will be easier to work with and offer your things better protection.
You will likely need the full arsenal of packing materials when it comes to packing your living room for moving.
You can save money by substituting bubble wrap with blankets or towels, and you may prefer to use plastic tote boxes than cardboard moving boxes.
Double-walled cardboard boxes
Good quality packing tape
Packing paper
Bubble wrap
Ziploc bags
Industrial shrink wrap
Masking tape
Marker pens
Save time and money on your move
Save up to 40% on your upcoming move and get a quote from reputable moving experts.
Before we get onto the details of packing specific items, there are some generic tips for making packing your living room easier and making moving cheaper.
#1 Declutter Your Living Room
The fewer items you have to take to your new home the quicker and cheaper your home move will be. Go through all your possessions separating all the things that need throwing away, can be donated to a worthy cause, or can be sold.
Keep only the things you really need and love. The more ruthless you are in decluttering your living room the better.
You may also like to read: The Epic Guide to Decluttering for a Home Move. In this guide, we take you through the process of how to declutter your home and also how to detach yourself emotionally from your possessions which is often the hardest part of decluttering.
#2 Create a Floor Plan
Create a floor plan for your new home to determine if your existing furniture will fit in the available space.
By measuring the furniture you have, you will know whether you can physically get the furniture along the route that you will take to and from the removal van.
You may also like to read: How to Create a Simple Floor Plan. From how to measure your home and furniture to how to create a simple floor plan, this is an invaluable guide to anybody moving home.
#3 Assess Your Furniture
Before deciding to pack and move any living room furniture, you need to consider if it is worth moving that item.
Ikea-type furniture is rarely worth the effort or expense of moving. Flat-pack furniture is likely to be damaged at either the dismantling stage or when it is being handled.
Assess any antique furniture as to whether it is too fragile to move or needs specialist packing and moving equipment.
Is the piece of furniture damaged or needs replacing anyway?
It may be that some pieces of furniture you have are just too big and heavy to move.
In each case, decide whether it makes more sense to try to sell, or give, the item to the new occupier, or to try and move it to your new home.
You may also like to read: Moving With No Furniture. In this guide, we look at whether it makes sense to move your furniture to your new home or not.
#4 Consider Using Plastic Tote Boxes for Packing
The modern alternative to cardboard packing boxes is the plastic tote, and there are many great reasons why you might like to use them during your home move.
They need no assembly so are quicker to use and you need not buy packing tape
If your things are going into storage in the loft or garage for example they will not deteriorate like cardboard will
You can hire plastic crates rather than buy them
When you have finished with them most hire companies will come to collect them
There is no worrying about how to get rid of your boxes after they are unpacked
Plastic tote boxes stack better than cardboard boxes
You may also like to read: Alternative Packing Materials for Moving Home. In this guide, we look at the pros and cons of cardboard boxes vs plastic totes as well as look at items that you can use for packing around the home.
#5 One Cupboard, One Box
If you will be putting the contents of one drawer, shelf, or cupboard back into the same piece of furniture in your new home, then pack the contents exactly as you will unpack.
So, if you have a shelf of books that will go back in exactly the same place, put those books in one box.
Do not mix things from other shelves.
#6 Take Photographs
Take photographs of any high-value items before and after packing. This will assist you greatly should you need to make an insurance claim in the event that anything gets damaged during the move.
#7 Hire a Professional Packing Team
Finally, consider very carefully whether you really want to go to the expense, and put yourself through the laborious task of packing your home contents yourself.
Packing for a home move is a long process that will take you far longer than you imagine.
The advantage of hiring a professional packing team is that not only will your things get the best protection during your move, but they will pack your things at the very last moment. That means that you will not spend weeks living amongst piles of moving boxes.
It is also an important point to note that many insurance companies will not cover any items that you have packed yourself, so check your insurance policy very carefully.
When you consider all the time, work, and stress that packing will cause you, hiring a full-service removal company makes so much sense.
To see what incredibly good value-for-money a professional packing team is you can get a free no-obligation quote in just a few minutes via this online quote form.
You may also like to read: Are Professional Packers Worth the Cost? The vast majority of people who have moved home will tell you that hiring packers was the best money they spent during their relocation. In this guide, we look at what professional packers do, how much they cost, and whether it makes sense to hire packers in your particular circumstances.
Still not convinced? Read on to discover how to pack the wide variety of items that you might typically find in a living room before making your final decision.
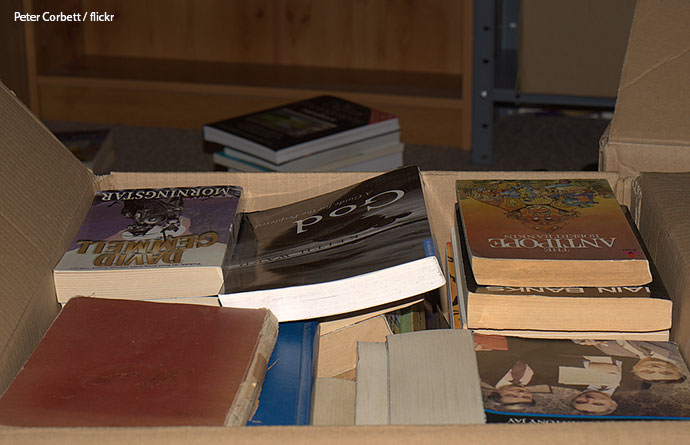
How to Pack Books for Moving
Always lay books totally flat to prevent damage to their spines
Use only small boxes to pack books or the boxes will become too heavy to safely move
Small, wheeled suitcases are also great for moving books
Always double-tape the bottom and top of boxes that have books in them
Lay books flat, spine to spine within the box
Pad the box to ensure that the books cannot move around as they are moved
Clearly label the box as books, heavy, and which room they should be placed in within your new home.
Whatever your taste in ornaments, take special care of them when packing for a home move
The ornaments in your living room will be of a wide variety of shapes and sizes, but the packing method will be similar for them all.
Wrap the ornament in 2-3 sheets of packing paper
Bubble wrap the entire ornament paying special attention to any particularly delicate or protruding parts. You may need several layers of bubble wrap if the item is fragile. Seal with packing tape.
Line the bottom and sides of a packing box with several layers of bubble wrap.
Place the ornament in the nest of bubble wrap
If putting several ornaments in the same box, separate them with thick cardboard or extra bubble wrap so that they are not touching each other.
Fill any gaps within the box so that the ornaments cannot move about
Add a final layer of bubble wrap on top before sealing the box
Label the box as fragile, this way up, what the box contains, and which room the box is to be placed in within your new home.
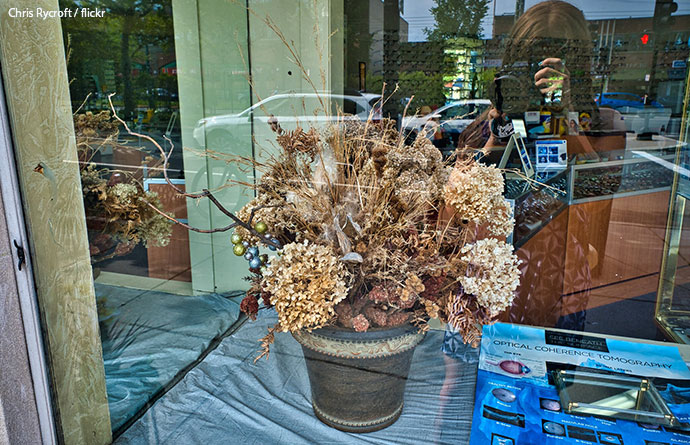
How to Pack Artificial Plants for Moving
Don’t remove dried flowers from their pot when packing them for moving.
Do not remove the artificial flowers from their vase or pot
Select a box that allows the flower arrangement to fit snugly within it, but is also about 10cm taller.
Line the bottom of the box with bubble wrap at least 10cm deep
Add bubble wrap to the inside walls of the box to create a nest for your vase to sit in
Insert the vase of artificial flowers ensuring that the arrangement is protected on all sides by the bubble wrap.
Ensure that there is no movement within the box by filling any gaps with bubble wrap or scrunched-up newspaper
Seal the box with good-quality packing tape
Clearly mark the box as fragile, this way up, artificial flowers, do not stack anything on top, and which room the box is to be put in your new home.
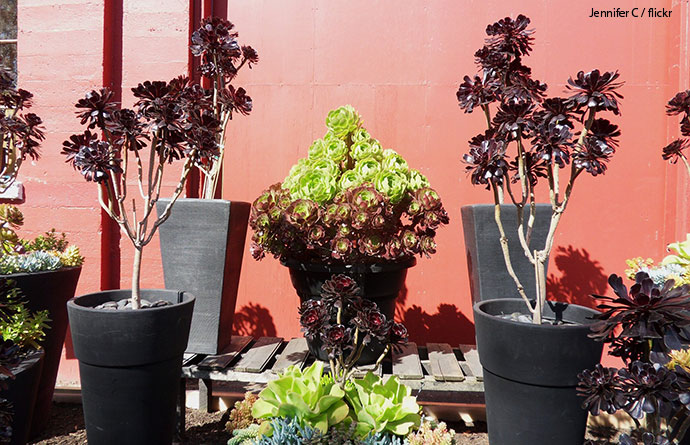
How to Pack Plants for a Home Move
Plants offer some interesting packing challenges
Pack plants that are moist in plastic tote boxes or line the cardboard box with thick refuse sacks to stop any water from escaping and damaging anything else on the removal van.
Wrap the plant pot in bubble wrap
Select a packing box about 10cm deeper than the tallest plant
Pad the bottom of the box with at least 10cm of bubble wrap
Line the box with bubble wrap to create a nest for your plants to sit in
Slip the plant pots into the box
Place cardboard between the plants so that they do not touch each other
Close and seal the box with good-quality packing tape
Clearly mark the box as plants, fragile, this way up, and which room they should be put in at your new home.
You may also like to read: How to Move Plants to a New Home which covers this subject in far more detail explaining how to prepare your plants for moving, how to safely pack your plants, and how to settle them into your new home.
How to Pack Mirrors and Pictures for Moving
Packing crates offer your artwork maximum protection during your move
Use masking tape, not packing tape as it will leave a residue when removed, place tape corner to corner, creating an ‘x’, across the glass of the mirror or picture. This will prevent shards of glass from causing any further damage should the glass get broken.
Place the mirror/artwork face up on a pile of packing paper
Wrap the frame in 2-3 pieces of packing paper
Take a piece of cardboard the same size as the glass, and place it over the glass.
Secure the cardboard in place with tape
Wrap the entire mirror in several layers of bubble wrap and secure with tape
Select a packing box that is slightly larger than the frame you are putting in it
Pad the bottom and walls of the box with several layers of bubble wrap
Insert the mirror or picture into the box
Fill any gaps within the box with bubble wrap so that the mirror or picture cannot move about.
If placing several pictures in one box, slip a sheet of cardboard between each frame
Add a final layer of bubble wrap on top of the frames before sealing the box.
Very clearly label the box that it is fragile, contains glass, this way up, what is inside, and which room it should be placed in within your new home.
You may also like to read: How to Pack Pictures and Mirrors for Moving which contains more comprehensive packing instructions and tips to protect your artwork and mirrors during a home move.
How to Pack Curtains for Moving
A Wardrobe box allows you to hang your curtains thereby reducing any creases
Often curtains are not taken when you move home as they rarely fit the windows, or they do not match the décor, in a new home.
If you are moving locally then you could take your curtains to be dry cleaned and then collect them after you have moved.
That way you will not have to worry about how to pack them, and they will not be bringing dust into your new home.
But if are taking your curtains with you then here are some packing tips to ensure that they arrive in pristine condition.
How to Pack Curtains in Wardrobe Boxes
Wardrobe boxes will offer the best packing solution for moving curtains, but they are expensive.
Cover the hanging bar in the wardrobe box with packing paper to ensure that no residue from the bar ends up marking your curtains
Tape the packing paper in place to stop it slipping off the pole
Fold the curtains lengthways and loosely drape them once or twice around the wardrobe bar
Secure the curtains with string or their tie-backs just below the wardrobe bar so that the curtains cannot slip off the bar.
How to Pack Curtains in a Moving Box
Curtains can be heavy, so choose an appropriately sized box that will keep the weight to a manageable level.
Line the box with packing paper
Fold the curtains loosely so that they slip easily into the box and do not get creased
Place a final layer of packing paper on top of the curtains before sealing the box shut.
Bonus curtain packing tip: To make it easier when unpacking your curtains so that you know which curtains will go up at which window:
#1 Measure the curtains
#2 Photograph your curtains
#3 Save the photo on your phone along with the measurements
#4 Repeat for each set of curtains you are taking
#5 Then when you get to your new home, measure the windows.
#6 It is then easy to select the right-sized curtain for the right window frame from your photo gallery
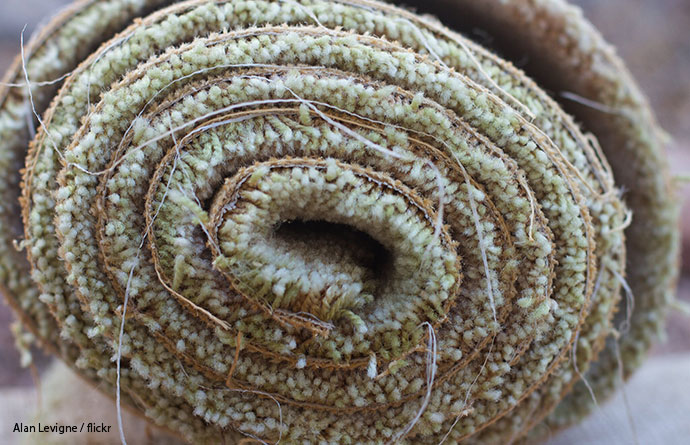
How to Pack Rugs for Moving
Roll rugs with the backing facing outwards
Turn over the rug so that the backing is now facing up towards you. This is because the backing is often brittle and can easily get damaged during the move.
Taking the shortest side, roll the rug into a tight cylinder shape.
Then use twine around the centre to secure the rug in the roll
Secure each end of the roll with twine
To prevent the face of the carper from getting soiled or damaged, wrap the carpet roll in packing paper
As long as the rug is going to be unpacked and not kept in storage, you could shrink-wrap the rug to keep it tight and clean.
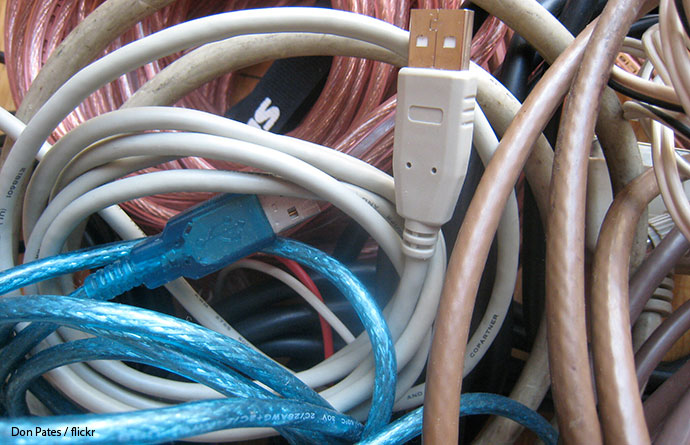
How to Pack Electronics for Moving
Photograph the connections so you know exactly what goes back where
From satellite channel boxes to music centres, there are likely to be several different electronics in your living room that will need to be properly protected during the move.
Packing electronics for moving follows the same principle for each item.
Photograph all the connections before disconnecting them
Label each connection so that you know exactly where to plug each one back into
Disconnect and coil cables.
Wrap a bundle of cables in bubble wrap
Label the bundle as to which electronic item they belong to just in case the bundle gets separated from the item
Take your electronics and wrap them in acid-free packing paper and secure them with tape
Cover the entire item in bubble wrap and secure it with tape
Line the moving box with bubble wrap
Place the electronic item inside, along with the bundle of cables
Ensure that the item cannot move around inside the box by filling any gaps with bubble wrap
Place a final layer of bubble wrap on top before taping shut the box
Clearly label the box what is inside and which room it is to be put into at the new home
You may also like to read: How to Pack Electronics for Moving contains more comprehensive instructions and packing tips for packing electronics.
You may also like to know How to Pack Vinyl Records for Moving. This comprehensive packing guide will tell you all you need to know to protect your record collection, music system, and speakers during your home move.
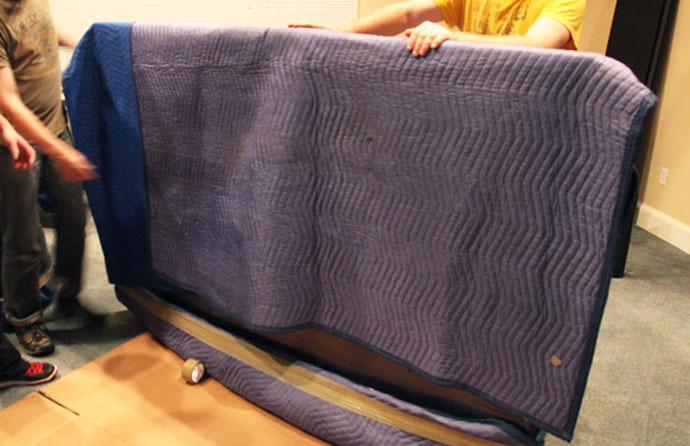
How to Pack a TV for Moving
Furniture blankets offer great protection to your TV during your move
A TV is one of the items most likely to get damaged during a home move.
For this reason, many people choose to invest in a packing box that is specifically made to protect a TV during moving, but they are not cheap.
It is often due to a combination of poor packing, mishandling, or poor loading of the removal van that results in TV damage.
But with the proper packing techniques, however, your TV will be given the best protection possible.
Photograph not only all the connections so that you know how to set up your TV again but also to record the condition of it before you pack it. This could be useful if you need to claim on your insurance.
Label any cables so that you know exactly how to reconnect your TV
Give the TV a good clean so that you don’t transfer any dust to your new home.
Remove any brackets or stands, and along with the remote control, wrap in bubble wrap.
Put any screws or nuts and bolts in a Ziploc bag so that you don’t lose anything, and add to the bubble-wrapped bundle.
Wrap several layers of bubble wrap around the entire TV set and secure it with tape.
Protect the corners of the TV set with foam or corner protectors made from bubble wrap and cardboard. Tape them securely to each corner.
Spread a furniture blanket on the floor and place the TV in the middle with the screen facing upwards
Fold the blanket around the TV ensuring that it totally covered by the blanket
Tape or shrink-wrap the blanket so that it cannot fall off
Select a box that is large enough to fit the TV into (a bike box from a cycle store is ideal if you don’t have the original box or do not want to buy a specific TV box)
Pad the bottom of the box with bubble wrap
Insert the TV
Stuff bubble wrap down the sides so that the TV cannot move about inside the box
Place the brackets bundle that you made earlier into the box (do not place it on the screen side of the TV).
Add a layer of bubble on top before sealing closed the lid of the box
Take another photo to show how well you have protected your TV
Label the box as fragile, this way up, TV, and which room it is to go onto in your new home
You may also like to read: How to Pack a TV for Moving which offers far more in-depth packing and moving tips for your TV.
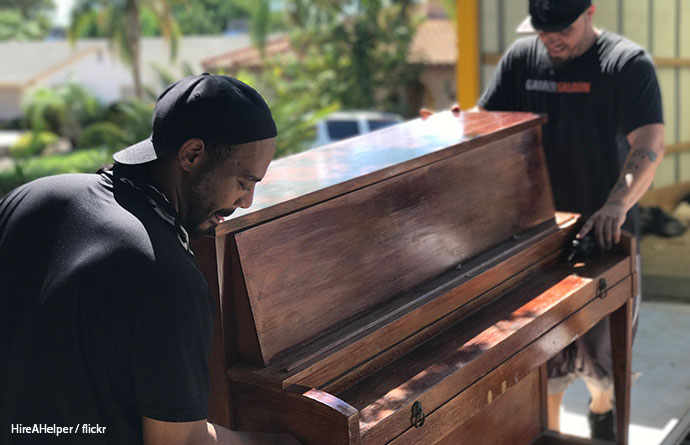
How to Pack a Piano for Moving
Leave packing and moving a piano to the professionals
Packing a piano for moving is a highly specialised task and it is really not recommended that you attempt to pack and move a piano yourself.
Always seek professional advice before attempting to pack or move an acoustic piano.
However, you may be able to safely pack and move electronic keyboards or pianos yourself.
Portable digital pianos are fairly easy to pack and move yourself, after all, they were designed to be portable.
If possible always use a hard case to move your digital piano, but if you do not want to go to the expense of a hard case, then follow these electronic piano packing tips.
Photograph the piano to document its condition before you pack it
Disassemble the digital piano by removing the keyboard from the stand. This is usually a case of removing the screws at each corner of the keyboard.
If possible keep the screws in their position without totally removing them. This way they will not get lost during the move. If you must remove them then place them into a Ziploc bag so that they do not get lost.
Unscrew the sides and pedal board, again keeping the screws in situ if possible.
Wrap each component in several layers of bubble wrap and secure it with tape
Spread out a furniture blanket on the floor and place the keyboard in the centre of the blanket.
Fold over the blanket and shrink-wrap or tape the blanket securely in place
Place the keyboard into a box that you have padded with bubble wrap.
Ensure the keyboard cannot move around inside the box
Add an extra layer of bubble wrap on top of the keyboard before sealing closed the box
Clearly mark the box as fragile, keyboard, this way up, and which room it is to be placed within the new home.
If it does not make the box too heavy you can place the stand components in the same box, if not pack the stand in the same way that you did the keyboard
Take another photograph to show how well you have packed the digital piano if you do need to file an insurance claim
Always refer to the manufacturer’s instructions when dismantling a digital piano (these are usually available online if you have lost the originals)
Always ensure that you have adequate insurance to cover your digital piano if it gets damaged or lost during the move.
Along with Pianos, Grandfather Clocks are extremely difficult to pack and move by yourself.
Unless you are an enthusiast who knows exactly how to dismantle, and more importantly, how to reassemble a grandfather clock themselves, then always leave it to a professional.
Should you attempt to dismantle, then pack, and move a grandfather clock yourself, you may find that the remedial bill to get your grandfather clock back to perfect working order will cost you far more than if you had hired professional clock movers in the first place.
We have, however, put together a comprehensive guide on how to dismantle, pack, move, and reassemble a grandfather should you wish to know the process – How to Move a Grandfather Clock by Yourself.
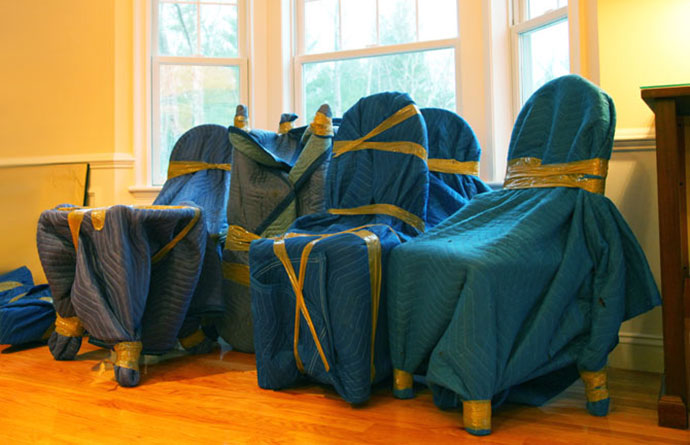
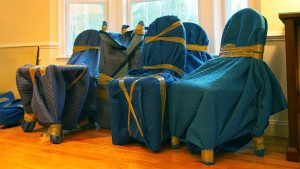
How to Pack a Sofa for Moving
Photograph your settee so that you have pictorial evidence of its condition before you pack it. This will be useful should you need to submit an insurance claim if there is any damage caused to it during the move.
Give your sofa a good clean so that you are not transferring any dirt and dust to your new home.
Remove any detachable cushions.
Wrap the cushions in shrink wrap or thick refuge sacks to protect them from dirt during the move.
If any parts of the sofa are removable, then remove them as it will make the sofa easier to move.
Wrap those parts in cling film, bubble wrap, or furniture blankets to protect them.
Any fixings that you remove should be placed in a Ziploc bag so that they do not get lost.
Now wrap the couch in shrink wrap to stop it from getting dirty during the move.
Leather settees would be best wrapped in furniture blankets
Pay special attention to any protruding parts such as arms that may need extra protection to stop them getting damaged. Wrap these parts in furniture blankets or bubble wrap.
Take a final photograph to have a record of the excellent way it was packed before it was moved.
You may also like to read: What is the Best Way to Move a Sofa? In this guide, we explain the safest way to move a sofa and the different moving equipment available to make the move easier and safer.
How to Pack a Wooden Coffee Table for Moving
Photograph the table so that you have a record of its condition before it was packed. This may be useful if you need to make an insurance claim for any damage caused during the move.
Lay a furniture blanket flat out on the floor.
Turn the table upside down in the middle of the moving blanket
Remove any legs and shelves that you can. This will keep the table safer and make it easier to handle during the move.
Wrap each removed piece in a furniture blanket. For short-distance moves, you can wrap them in bubble wrap, but wood needs to breathe, so if they are being put into storage or will not be unpacked for a long time, always wrap them in furniture blankets.
Place any fixings that you remove in a Ziploc bag.
Box the parts in a well-padded box ensuring the contents cannot move about within the box.
Clearly label the box as to what is inside and which room they should be placed in within your new home.
Wrap the wooden table top in the furniture blanket, securing it in place with tape
Pay special attention to the edges and corners of the table which are vulnerable to damage during the move. Give them an extra layer of protection should they need it.
Take a final photograph of the table to record how well packed it was should you need to make an insurance claim.
How to Pack a Glass Top Coffee Table for Moving
Photograph your glass-top coffee table to record the condition it was in when you packed it. You may need this evidence if you have to submit an insurance claim for any damage caused during the move.
If any parts of the coffee table are designed to be removed, such as legs, then do so as it will make the table lighter and easier to move.
Wrap the legs in furniture blankets and secure them with tape.
Place any fixings into Ziploc bags and label them clearly
Place the wrapped legs and fixings into a padded box ensuring that the contents cannot move around inside the box.
Clearly label the box what is inside and which room it is to be placed in within your new home,
Wrap the glass top in several sheets of packing paper secured in place with tape. Ensure the tape does not come into contact with the glass as it will leave a residue when you try to remove it.
Wrap pool noodles or foam pipe insulation around the edges and corners of the table to give it extra protection
Now wrap the glass table top in bubble wrap or a furniture blanket
Pad a box with several layers of bubble wrap to form a cushion for the table to slip into.
Bicycle boxes are great for large table tops if you can get hold of one.
Slide the tabletop into the box and fill any gaps with bubble wrap so that the table cannot move around inside the box.
Add an extra layer of bubble wrap on top before sealing the box shut.
Clearly label the box as glass, fragile, and which room it is to go into at your new home.
How to Pack Wooden Furniture for Moving
Shrinkwrap holds the furniture blankets securely in place
Take photographs of your wooden furniture so that you have evidence of the item’s condition when it was packed. This will be useful if you need to make an insurance claim.
Remove shelves and legs which will make the item lighter and easier to move.
As long as the drawers do not make the piece too heavy to move, leave them in place. This is because they will be far safer being in the item than moved separately.
Never use tape to keep drawers or doors shut as the tape is likely to damage the wood when it is removed. Always use furniture blankets to secure the drawers in place.
Wrap any parts you have removed in bubble wrap, ensuring that any fittings such as nuts and bolts are kept together in a Ziploc bag.
Wrap the entire piece of furniture in furniture blankets secured in place with shrink wrap.
Pay particular attention to the edges and corners of the piece of furniture and add extra layers of protection to those areas.
If you intend to put your wooden furniture into storage or will not be unpacking it for many weeks then avoid putting bubble wrap directly onto a wooden surface as plastic can sweat.
You may wish to add a layer of bubble wrap on the corners for example so wrap first in furniture blankets, add the bubble wrap, and then cover with shrink wrap to hold all the protection in place.
Label the item as to which room to place the piece of furniture in at your new home.
Photograph the piece of furniture again to show how well it was packed should you need to make an insurance claim.
You may also like to read: How to Move Heavy Furniture. In this guide, we share some safe lifting techniques and explain the different methods and equipment available to help you move your heavy and large furniture.
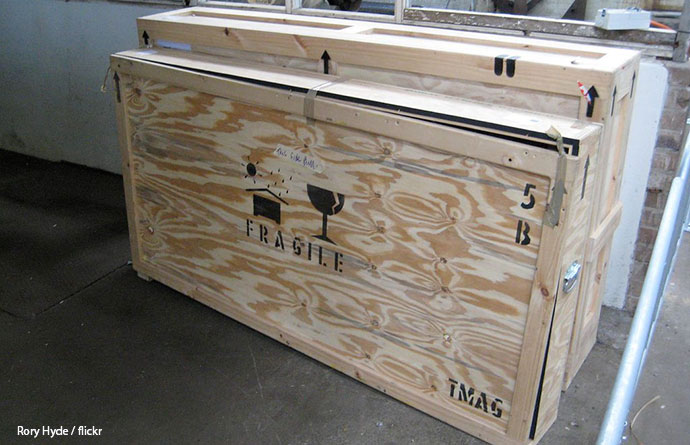
How to Pack Antiques for Moving
Antique furniture often requires specialist packing skills
Depending upon the emotional and monetary value of your antiques, you should seriously consider having them packed by a professional packing team as this will give them the ultimate protection during your home move.
Antiques are often ornate and fragile, and usually, justify the expense of having wooden shipping crates made for them.
You, therefore, should look for a specialist removal company that offers such a service and are expert in moving valuable antiques and collectibles.
Before moving your antiques you should have them appraised by an antiques expert. This will provide you with written confirmation of how much your antiques are worth so that you can ensure you have the correct level of insurance in place for them being moved.
The appraisal will also help you if you need to make an insurance claim after the move.
Note that many insurance policies will not cover antiques during your move if you have packed them yourself. Also, note that many standard removal company insurance policies will also not cover valuable antiques, so check any policies very carefully.
You may also like to read: How to Move Antiques and Collectibles. Packing antiques for a home move is highly specialised and room in this article is not sufficient to go into the details in the depth that they deserve. For comprehensive advice on how to choose a specialised antique removal company, how to prepare antiques for moving, and how to pack antiques and collectibles yourself, this is invaluable reading.
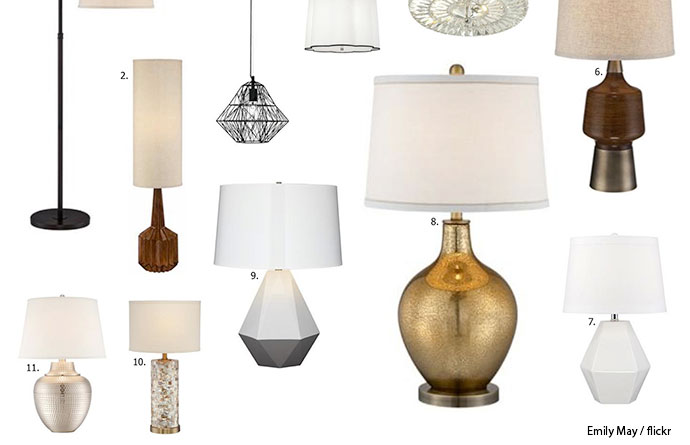
How to Pack Table Lamps for Moving
Ensure the 3-pin plug is wrapped several times in bubble wrap so that it does not damage the base of your table lamp
Before starting packing, photograph your table lamps to record the condition they were in when they were packed. This may prove useful if you need to make an insurance claim for any damage caused during your move.
Give the lamp a good clean so that no dust is transferred to your new home.
Remove the bulb and lampshade
If you have several lampshades to move to your new home then refer to the section later in this guide for lampshade packing tips.
Select a box at least 10cm bigger on all sides than the lamp that you are packing
Pad the bottom and sides of the box with at least 10ch of bubble wrap
Wrap the lamp in packing paper and secure it with tape
Wrap the plug in several layers of bubble wrap so that it cannot cause damage to the lamp base during the move.
Place the lamp into the nest of bubble wrap that you have created
Fill any gaps with additional bubble wrap so that the lamp cannot move about within the box.
Take another photo to show how well-protected the lamp was when you packed it.
Add a final layer of bubble wrap on top before closing and sealing the box
Clearly label the box as fragile, this way up, what the box contains, and which room it is to go into at your new home.
How to Pack Floor Lamps for Moving
Take photographs of your floor lamps to record the condition they were in before you packed them.
Clean your floor lamp so that no dust is taken to your new home.
Remove the bulb and lampshade. Refer to the next section of this guide for lampshade packing tips.
If the floor lamp is sectional, then take it apart and wrap each component separately.
Wrap each section in bubble wrap and secure it with tape.
Wrap the plug in several layers of bubble wrap so that it cannot cause any damage when in the moving box.
Pad a box with bubble wrap and place each section into the box.
Fill any gaps within the box with bubble wrap to ensure that they cannot move about.
Photograph the packed lamp again
Add a final layer of bubble wrap before closing and sealing the box
Clearly label the box as to what it contains, fragile, this way up, and which room it is to go into at your new home.
For comprehensive packing tips for lamps, chandeliers, and other odd-shaped items that you may find in your living room you may like to read: How to Pack Awkward and Odd-Shaped Items.
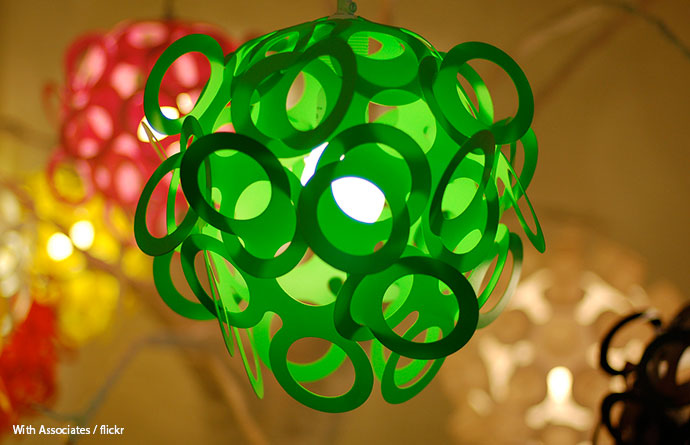
How to Pack Lampshades for Moving
Packing lampshades is a delicate process and not as easy as you may think
Spread out a pile of packing paper on a flat surface
Place the lampshade in the middle of a sheet of packing paper
Take 2-3 sheets of packing paper and wrap the entire shade
Secure the packing paper in place with tape ensuring that none comes into contact with the delicate lampshade
Take a packing box slightly larger than the biggest lampshade you will be placing within it
Line the box with several layers of bubble wrap
If you have several lampshades to pack then they can be slipped inside each other, Russian doll style, as long as they will not touch and damage each other.
Place the lampshade/lampshades into the nest of bubble wrap you have created in the box
Fill any gaps within the box so that the shades cannot move about.
Add a final layer of bubble wrap on top before sealing the box shut.
Clearly mark the box as very fragile, this way up, do not stack, what the contents are, and which room they must go into at your new home.
You may also like to read: How to Label Moving Boxes – An Easy and Foolproof Method. In this guide, we suggest a really good way to label your moving boxes which will make placing them in the correct room at your new home and then unpacking them so much easier.
How to Pack an Aquarium for Moving
Always seek professional advice before attempting to move a fish tank
Moving a fish tank to your new home is a complex process and depends a lot upon the species of fish that you have.
You should always seek professional advice when relocating fish to a new home as the shock to them could be fatal if you get it wrong.
We have created a guide specifically about How to Move Fish When Moving Home which goes into detail about the special equipment you will need to move your fish, how to prepare for moving fish, a step-by-step guide to moving fish, how to set up your aquarium in your new home, and finally a list of specialised websites that will help you safely relocate your aquarium to your new home.
Is Packing a Living Room Yourself Worth It?
As you now know, packing a living room for moving is a long and complex task. And it is just one of the many rooms to face packing for your home move.
Most home movers agree that the best value for money that they spent during their whole relocation was to hire a professional packing team.
Not only will they pack your home far quicker than could, but they will also pack more efficiently, making use of every piece of available space, thereby saving you space on the removal van and making the loading and unloading quicker.
A major advantage of hiring a professional packing team is that you will not spend weeks living amongst packing boxes as you would if you packed yourself.
The packing team will come in the day before you move and have you fully packed and ready to leave.
There is not really a price you can put on the stress and time that a professional packing team will save you, but most would agree that they offer excellent value for money.
You can get a free estimate as to how much it would cost to have your home packed using the quick, no-obligation online quote calculator.
If you decide that you still want to pack your things yourself, then be sure to visit our award-winning moving advice blog which offers comprehensive packing guides for every room and every item that you are likely to find in your home.
Good luck with your home move and if you have any packing tips for other readers then be sure to leave them in the comments below.
*At RemovalReviews we will connect you with a professional moving company. Please note that we may not be affiliated with
and you may be speaking with another licensed provider.
Best removals nearby
We use cookies to optimise your experience.Accept and close or Learn more


Share your thoughts by leaving a comment