When you are packing for a home move, starting in the dining room can make a lot of sense.
For most people, a dining room is not an essential everyday room, so it is the perfect place to set up not only your packing station but can also be used as a storage room for the moving boxes as you pack the rest of the house.
Packing up a dining room for moving poses a few challenges as there can be a wide variety of different things to pack, each of which requires different packing strategies.
Read on to discover all you need to know about packing your dining room for a home move.
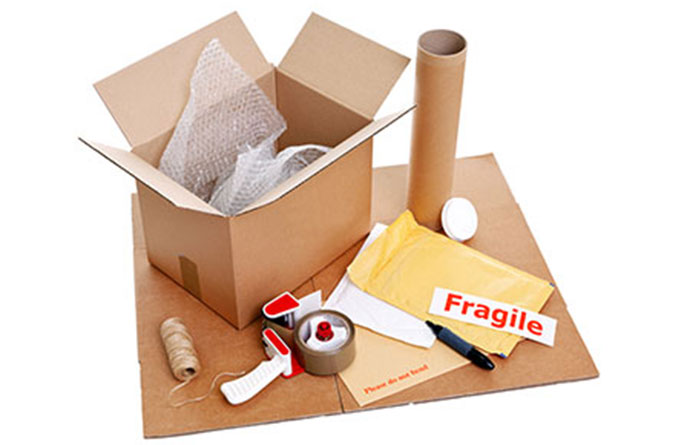
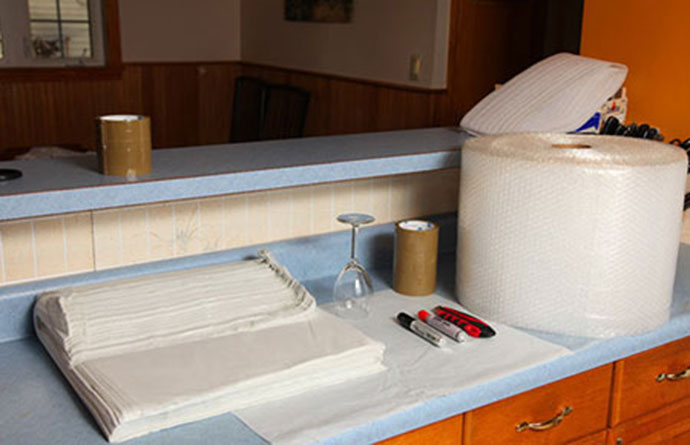
Packing Materials Checklist for Packing a Dining Room
Good quality packing materials will offer your precious furniture the ultimate protection during your home move
Good quality packing materials can soon rack up the cost of your home move, but the money is well spent.
Buy as strong boxes and tape as you can find, using cheap packing tape is especially frustrating, time-consuming, and often leads to boxes bursting open as they are moved.
For packing a dining room you will need:
Packing boxes
Good quality packing tape
Tape Gun
Packing paper
Bubble wrap
Furniture blankets
Shrink wrap
Masking tape
Marker pens
You might like to also read: Alternative Packing Materials in which we look at things you have around the home that you could use to help you pack for a home move, thereby saving you some money.
Save time and money on your move
Save up to 40% on your upcoming move and get a quote from reputable moving experts.
How to Protect Corners of Furniture When Moving Home
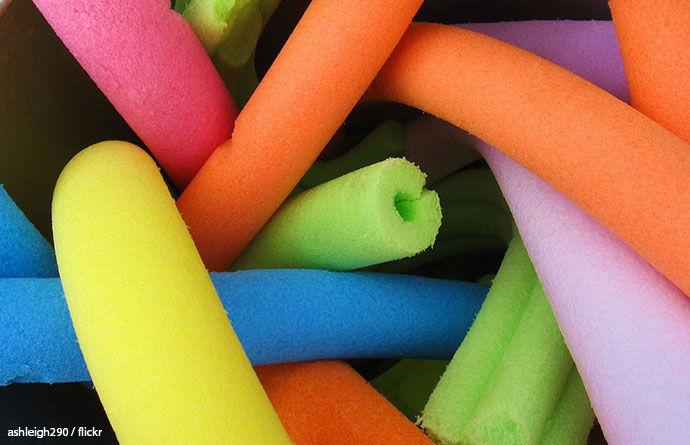
Pool noodles are great for protecting the corners and edges of furniture
One of the most vulnerable parts of furniture is the corners.
During the home move, the corners of your furniture are likely to take the brunt of any mishandling or mishaps.
But a few minutes spent giving the corners of your furniture some extra protection could save you a lot of expense and heartache in the future.
Protecting the corners of your furniture is fairly easy and there are a couple of techniques you can use.
#1 Protect Corners With Bubble Wrap
Add a length of folded-over bubble wrap along the edges and on the corners of your furniture when moving them.
You can add an extra layer of protection to this by folding over some bits of cardboard and taping this over the corners.
Ensure no tape touches the surface of your furniture or it will leave a residue when removed. Using masking tape will prevent any marks from being left on your furniture.
#2 Protect Corners With Pool Noodles
Another option is to secure pool noodles or foam pipe insulation along the edges and over the corners of your furniture.
Foam pipe lagging will already be split lengthways so can just be slipped over the edges of the item you are trying to protect.
Run a knife along the length of a pool noodle to allow you to be able to slip it over the edge or corner of the piece you want to protect.
Secure in place with masking tape not packing tape so that no residue is left on the furniture when you remove the tape.
#3 Cardboard Corners
Having wrapped your furniture in bubble wrap you could fold over some scraps of cardboard to make protective corners. Tape them securely in position.
#4 Furniture Blankets
Your final level of protection will be a furniture blanket which will engulf the entire piece of furniture for the ultimate protection.
You may also like to read: How to Protect Walls, Doors, Corners, Floors, and Ceilings You should ensure that your walls, doors, floors, and ceilings are also well padded to prevent damage to them and your furniture as it is moved in and out. Find out all you need to know about protecting your home in this comprehensive guide.
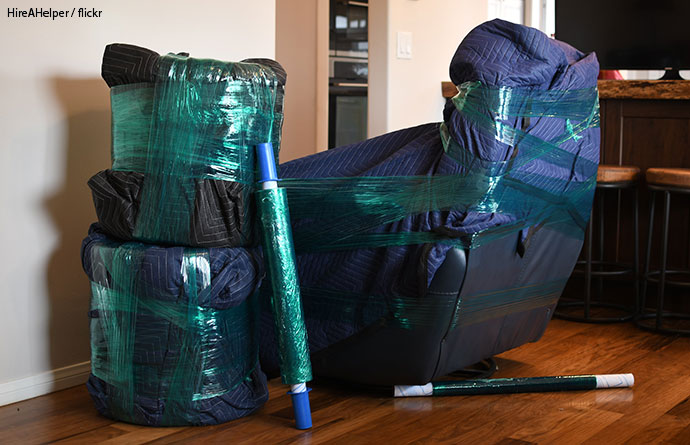
How to Shrink Wrap Dining Room Furniture for Moving Home
Shrink-Wrap is an invaluable packing aid
Industrial strength shrink wrap is a versatile packing material but should be used with caution if your things are going into storage for example.
Before directly shrink-wrapping any piece of furniture ensure that it is perfectly clean and dry.
Any moisture trapped within the shrink wrap could cause mold if your furniture is not in a temperature-controlled storage facility or will not be unpacked for a long time.
That caution aside, shrink wrap can be used in a variety of packing situations and is a great addition to your packing supplies list.
What Can You Use Shrink Wrap For When Moving Home?
#1 Securing Cabinet Doors
You can quickly and easily secure cabinet doors shut with cling film.
It is a great option because the cling film sticks to itself, not your furniture, so when you remove it, there will be no adhesive residue left to clean off.
Shrinkwrap is also great for securing closed doors of appliances such as cookers, fridges, and freezers.
#2 Securing Cables in Place
Rather than zip-tying or taping up cables and plugs, which is time-consuming, a few wraps of shrink wrap will hold your cables securely in place.
#3 Securing Loose Items
From the arm of your record player to furniture parts, and curtain rails, to keeping jewellery secure, shrink-wrap is a great option for keeping things together or ensuring that they do not move around when being moved.
#4 Preventing Scratches
If an item you are moving has a very fragile surface then wrap it in shrink wrap before wrapping it in bubble wrap.
Any packing material could cause minute scratches on delicate surfaces, but a layer of shrink wrap first will prevent this.
#5 Protecting from Dust and Dirt
To protect an item from dust and dirt, wrap it in shrink-wrap.
This is particularly important for things like electronics where even a small piece of dust could cause havoc.
Shrink wrap is also very useful for giving a protective layer to mattresses and settees when you want to keep them clean and dry.
#6 Keeping Packing Boxes Dry
If the rain pours down on moving day a few turns of shrink wrap will keep your moving boxes perfectly dry.
The advantage of using shrink wrap rather than heavy-duty refuse sacks for example is that shrink wrap is transparent so you can still clearly see the box labels.
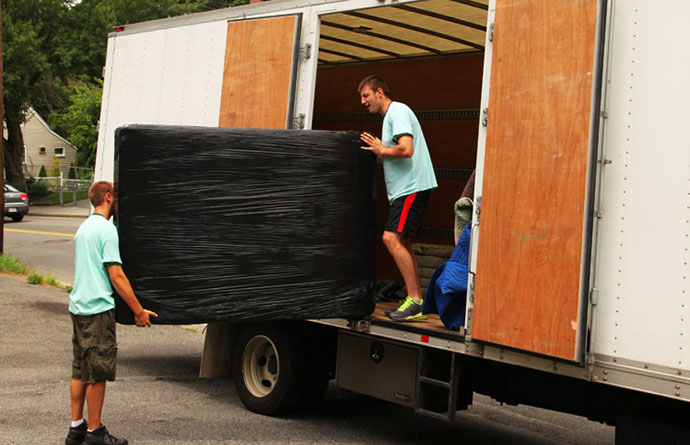
How to Wrap Furniture with Shrink Wrap for Moving Home
Secure one end of the shrink wrap to a secure part of the furniture such as a leg.
Starting from the bottom and working your way up, wrap the item horizontally in film.
You may find it easier to work with another person. They can either hold the piece of furniture in place whilst you wrap it, or you can pass the wrap to them and they continue wrapping the parts that you cannot reach.
Make sure to keep the film taut as you wrap the furniture.
The more layers of wrap you use, the more protection you add.
For ultimate protection wind the film both horizontally and vertically around the furniture.
Thoroughly clean and dry your table before packing
Photograph the table from every angle. If the table gets damaged during the move, you will have photographic evidence of the condition of the table when you packed it.
Number each table leg and the corresponding place it is positioned on the table by writing on a piece of masking tape and fixing it to the table leg and the underside of the table. It may be that the legs are interchangeable but it is better to be safe than sorry.
Remove the table legs as it will be easier to maneuver the table without them.
Keep all the fitments in a Ziploc bag so that none get lost
Wrap each of the legs in bubble wrap then add the bag of fitments and shrink wrap so that they make one tight bundle
If it is a large table with a heavy extension leaf, remove it
Wrap in bubble wrap, secured with packing tape.
Add extra protection to the corners of the extension leaf
Then surround the whole piece in furniture blankets, again secured in place with tape.
The actual table top itself can then be wrapped using exactly the same technique
For drop side tables secure the drop leaves in place with shrink wrap before bubble wrapping and adding the furniture blankets.
Photograph the table again to prove how well the table was packed should you need to make an insurance claim.
You may also like to read: How to Pack Glasses and Plates for Moving. In this guide, we share the best way to pack all your crockery and glasses ready for a home move.
How to Pack a Glass Top Table for Moving Home
Thoroughly clean your glass table top before starting to pack.
Photograph the table from all angles. If the table were to get damaged during the move, you would have photographic evidence of the condition of the table before you packed it.
By writing on a piece of masking tape, and fixing one piece to the leg and the corresponding part to the underside of the table, number each leg. So leg #1 goes with position marked #1. It may not matter, and any leg will fit any of the positions, but it is a quick and easy part of the packing process that may save you some stress when you try to reassemble your dining table later.
Remove each of the table legs as it will be easier to maneuver the table without them.
Keep all the fitments in a Ziploc bag so that none get lost during the move
Wrap the legs individually in bubble wrap then add the bag of fitments.
Finally, shrink wrap so that they make one tight bundle
Now cover the entire glass table top in bubble wrap and secure with tape
Take some cardboard and place two thick sheets on each side of the table to create a cardboard and bubble wrap sandwich.
Secure in place with tape
Ensure that the edges of the glass top are well protected with either pool noodles, foam pipe lagging, or layers of bubble wrap.
Cover the entire glass table top with furniture blankets and secure in place with shrink wrap or tape.
Clearly label the package you have made as glass, extremely fragile, and which room it should be placed in within your new home.
Take one final photo from each angle to clearly show how well you have packed your glass top table.
You may also like to read: How to Pack Antiques and Collectibles for Moving. Many people have antiques and collectibles displayed in their dining rooms. In this guide, we share some invaluable information about preparing and packing antiques and collectibles for a home move.
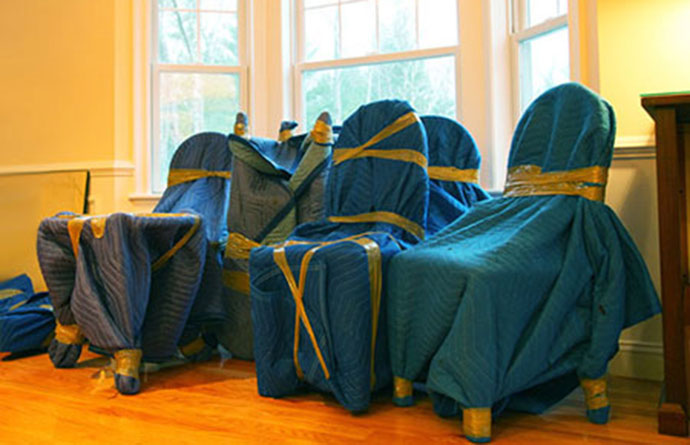
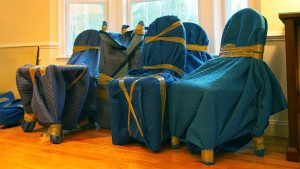
How to Pack Dining Room Chairs When Moving Home
Furniture blankets offer excellent protection to furniture during a home move
The legs and arms of dining room chairs are notoriously easy to damage during a home move if they are not properly packed.
So if they are designed to be removed, then do so.
However, do not remove them if it is not easy to do so, with the right packing techniques and careful handling they will arrive unscathed in your new home.
How to Pack Dining Room Chairs with Detachable Legs
Clean and polish each chair before starting to pack them.
Photograph each chair from various angles to document their condition when they were packed.
Writing on masking tape, mark the legs as FR (front-right) FL (front-left), etc, and stick the label to the corresponding leg and another marker on the corner of the chair they were removed from.
Now detach each leg.
Place any fittings you remove into a Ziploc bag.
Bubble wrap each of the chair legs, securing it with packing tape
Shrink wrap the legs and bag of fitments together to make a secure bundle.
Wrap the chair seat and back in bubble wrap and secure in place with packing tape. Do not allow any tape to touch the surface of your chair as it may leave an adhesive residue when you take the tape off.
If your chairs have finials or elaborate parts that could get damaged easily, then add extra layers of bubble wrap as required.
Finally, wrap the whole chair in a furniture blanket and secure it with shrink wrap or packing tape.
Take a photograph of the chair once packed as evidence of how well packed they were in the case of an insurance claim.
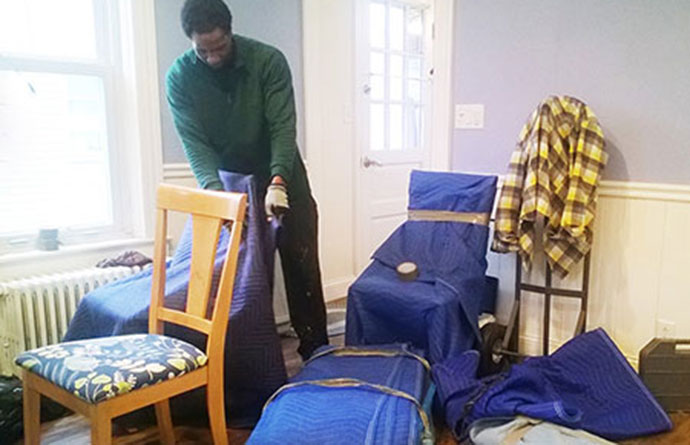
Tips for Packing Dining Room Chairs for Moving Home
Each chair should be cleaned before you start packing.
Photograph each chair to document the condition they were in when they were packed. This may help if you need to submit an insurance claim.
Wrap each leg and arm in a couple of layers of bubble wrap. Secure with packing tape, ensuring that you get no tape on the surface of the chair.
Around the arms and legs, or any protruding parts, add another layer of cardboard as protection.
Now wrap the entire chair in furniture blankets ensuring every part of the chair is completely protected.
Use a large blanket for the seat pads, and smaller blankets to wrap the arms and legs.
Secure the blanket in place with tape or shrink-wrap.
Take one final photograph that shows the packed chair from all angles, just in case you have to make an insurance claim.
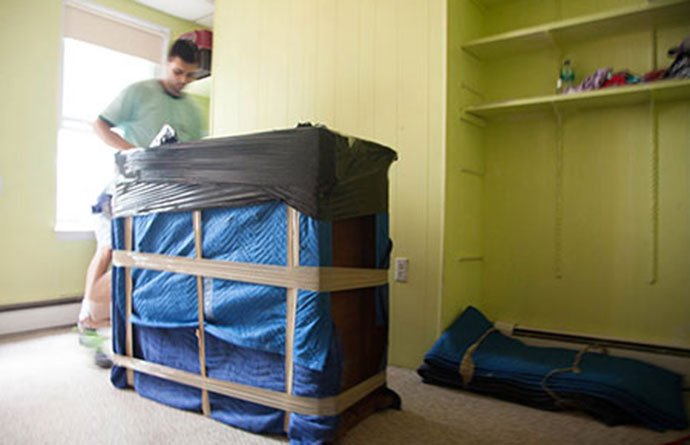
Wooden furniture is prone to mold damage if incorrectly packed and stored
Knowing how to properly pack a sideboard, display cabinet, or wooden bookshelf properly will help prevent any damage being caused to wooden furniture during the move.
If you intend to put your wooden furniture into storage, or will not be unpacking it for a while, then be sure to treat the wood with a high-quality furniture polish before packing. Wood can dry out very quickly, especially if it is not stored correctly and the polish will help keep the wood hydrated.
Take photographs of your furniture so that you have evidence of the item’s condition when it was packed. This is just in case you need to make an insurance claim.
Remove anything that makes the item heavier or more awkward to move such as shelves and legs.
As long as the drawers do not make the piece too heavy to move, leave them in situ. They are far safer being in the item than moved separately. Like cupboard doors, the drawers will be held in place by the furniture blankets and shrink wrap.
Never use tape to keep drawers or doors shut as the tape is likely to damage the wood when it is removed.
Wrap the parts you have removed in bubble wrap, ensuring that any fittings such as nuts and bolts are kept together in a Ziploc bag.
Wrap the entire piece of furniture in blankets securing them in place with industrial shrink wrap.
Pay particular attention to the edges and corners of the piece of furniture and add extra layers of protection to those areas.
Avoid using bubble wrap directly onto a wooden surface as plastic can sweat.
If you want to add a layer of bubble wrap on the corners for example then wrap first in furniture blankets, add the bubble wrap, then cover with shrink wrap to hold all the protection in place.
Label the item so that the removal team knows which room to place the piece of furniture in at your new home.
Photograph the piece of furniture when you have finished packing it just in case you need to make an insurance claim.
You may also like to read: How to Move Heavy and Large Furniture in which we look at the safest and most efficient ways of moving heavy furniture to your new home.
How to Pack Glass Cabinets When Moving Home
It is no surprise that glass display cabinets need extra special attention when packing them for a home move. But with these packing tips, there is no reason why your glass cabinets should be damaged during your move, as long as they are handled properly as well.
Photograph the cabinet to record the condition of it before you pack it. This could be invaluable should you need to submit an insurance claim for any damage caused during the move.
Remove all the glass shelves (the next section covers how to pack these in detail).
Remove all the shelf fixings and place them in a clearly labeled Ziploc bag.
Never try to move a glass cabinet that has things inside that could dislodge and move around as the cabinet is moved.
If the doors make the cabinet too heavy to move then remove them.
Be sure to remove any door knobs if possible as this will make it easier to wrap the doors.
Secure the door knobs and any fittings in a Ziploc bag which should be clearly labeled.
Wrap the doors in 2-3 layers of packing paper.
Bubble wrap the doors next and secure them with packing tape.
Take a furniture blanket and wrap the entire door in it.
Pay particular attention to protecting the corners of the glass doors adding extra layers of bubble wrap if they need it.
Now shrink-wrap the furniture blanket in place so that it cannot slip off.
Remove any legs, feet, or castors, and place them in a labeled Ziploc bag.
If the legs or feet are not removable then ensure that they are very well protected by covering them completely with the furniture blanket and bubble wrap.
Now wrap the entire cabinet in furniture blankets, adding extra protection to the corners to ensure they are well protected.
Secure the furniture blankets in place with shrink wrap.
Add a layer of bubble wrap around the entire cabinet and tape it in place.
Finally, wrap the entire cabinet in sheets of cardboard and tape it into place.
Label the glass cabinet as fragile, this way up, handle with care, and the room you want it placed in within your new home.
Take a final photograph of the wrapped cabinet, again for if you need to submit an insurance claim.
You may also like to read: How to Pack Fragile Items for Moving (such as ornaments). Many display cabinets contain delicate items that require special attention when being packed. This guide shows you how to give fragile items the ultimate protection during a home move.
How to Pack Glass Shelves for Moving
Having a packing station makes wrapping things like shelves so much easier
When packing glass shelves for moving the idea is to create a sandwich of protective layers to give your glass shelves maximum protection.
Note that glass shelves should always be stood on their ends, never laid flat, or else they will easily be cracked.
Photograph your glass shelves as evidence of their condition when you packed them. This may be useful in the event of an insurance claim.
Lay out a stack of wrapping paper flat on a hard surface
Place the glass shelf on top of the wrapping paper
Take 2-3 sheets of wrapping paper and wrap the shelf completely
Lay out a furniture blanket and place the shelf upon it.
Now wrap the shelf within the blanket and secure it with shrink wrap so that the blanket cannot slip off.
Wrap the shelf in a layer of bubble wrap and secure with packing tape
You may like to add pool noodles or foam pipe lagging to the end of the shelves for ultimate protection before wrapping them in furniture blankets and bubble wrap.
Finally, add a layer of thick cardboard on the outside, or if you have the right sized box, then slip the shelves into a cardboard box.
Do not put too many glass shelves into the box as it will be too heavy and awkward to lift and move.
Ensure that the shelves cannot move around inside the box by adding bubble wrap to fill any gaps.
Finally, mark the package as glass, fragile, cabinet shelves, and which room they should be placed in within your new home.
Take a photograph of the completed package in case you need it as evidence of how well you packed the shelves in the event of an insurance claim.
You may also like to read: How to Pack Pictures and Mirrors for Moving. Many people will also have pictures and maybe a mirror in their dining room. This guide will show you how to safely pack and move these items that are prone to damage during a home move.
How to Pack Wooden Shelves for Moving
If your wooden shelves are going into a storage unit, or will not be unpacked for a while, then clean them first with a high-quality furniture polish.
This will help keep the wood in pristine condition, especially if you are not storing it in a temperature-controlled environment.
Photograph the wooden shelves so that you have a pictorial record of their condition before you pack them. This will help in the event of an insurance claim should you need to make one.
Lay out several sheets of packing paper on a flat surface.
Individually wrap each shelf in 2-3 sheets of packing paper.
Wrap the entire shelf in bubble wrap and secure with packing tape ensuring that none of the tape touches any exposed wood.
If the shelves are particularly fragile or valuable it is worth wrapping them in a furniture blanket before the next step.
Now line a cardboard box with bubble wrap and insert each shelf into the box.
Do not put too many shelves into one box as it will be dangerous to lift.
Ensure the shelves cannot move about inside the box by padding out any gaps with bubble wrap.
Seal the box with good-quality packing tape.
Clearly label the box as shelves, which unit they are from, and into which room they must be placed in your new home.
Take a final photograph of the package to show how well packaged it was if you need to make an insurance claim.
You may also like to read: How to Pack Books for Moving. If you keep books on your wooden shelves then this guide will share some essential packing tips to make moving them easier and safer.
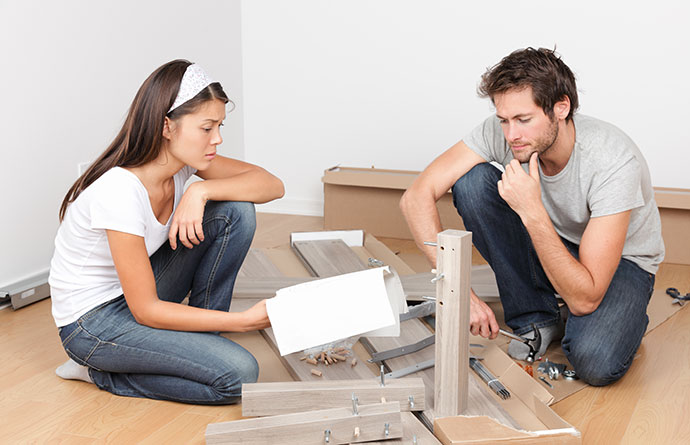
How to Pack Flat-Pack Furniture for Moving
Ensure you have the instructions or have labeled your furniture before attempting to rebuild it
Ikea-type furniture is great as an affordable way to get good-looking furniture, it is easy to transport and does exactly what it was designed to do.
However, when it comes to moving home, then flat-pack furniture poses several problems.
Generally, it is not a good idea to move flat-pack furniture to your new home.
If you try to move it without dismantling it you will likely cause irreparable damage to the furniture. And if you try to dismantle flat-pack furniture for moving then often this will result in damage to the fixings.
It is for this reason that many removal companies will not only be very reluctant to move flat-pack furniture, but they will almost certainly be uninsured for moving.
So before starting to dismantle and pack your flat-pack furniture, ask yourself if it is more cost-effective to leave the furniture in your old home and sell it to the new occupiers.
The dangers of moving it, the time you will take dismantling, packing, and reassembling it, then the cost of actually moving the piece to your new home are very rarely cost-effective.
Should you still decide that you will take your flat-packed furniture with you to your new home, then you need to be very careful.
You may also like to read: How to Pack a Grandfather Clock for Moving. Find out all you need to now about dismantling, packing, and moving a Grandfather clock in this invaluable guide.
How to Dismantle Flat-Packed Furniture
Take a photo of the assembled piece of furniture so that you know what it should look like when it is reassembled.
Place a piece of masking tape alongside each point where the item is joined by a fixing.
Do the same with the adjoining piece of wood.
Number the masking tape #1 on each piece of tape so that when you come to reassemble it you know that #1 and #1 align.
Do this for every fixing point, so #2 aligns with #2, #3 aligns with #3, and so on.
Have another person help so that they can hold each part steady as you dismantle it.
Place the fixings into small Ziploc bags clearly marked so that you know exactly what fixings are for where.
How to Pack Flat Pack Furniture for Moving
Wrap each panel in bubble wrap ensuring it is totally cocooned and then secure it with packing tape
It is very easy for the edges of flat-packed furniture to get chipped so pay extra attention to protecting the edges.
Mark each package with the numbers on the masking tape you wrote when you dismantled the item. This will make it easier when it comes time to reassemble the piece of furniture.
Line a box with bubble wrap and insert the wrapped panels into the box. Pad any gaps in the box so that the panels cannot move around.
Ensure that the box is not too heavy to lift.
Seal the box with heavy-duty packing tape
Clearly label the box what the contents are and into which room it must be placed in your new home.
You may also like to read: How to Pack and Move a Piano. Moving a piano yourself is no easy task, in fact, there are 120 piano moving tips in this guide. But if you are up for the challenge then this guide will tell you all you need to know about relocating a piano.
Should You Hire Professional Packers?
Hire a good removal company makes moving your furniture easier and safer
Clearly, packing for a home move is a long, laborious, and expensive task.
Many people choose to hire a professional packing service when moving home as it makes moving home far less stressful.
A good packing team will have your home boxed up in half the time it will take you, they will make the most efficient use of not only the packing materials but also the boxes they use, and the cost of such a service is often surprisingly good value for money.
Must read: Packing Services – Are they Worth It? Find out exactly what professional packers do and whether it is worth the cost of hiring a packing service for your home move.
Full-service removal companies will offer you all the additional services you need to make your home move as easy and stress-free for you as possible.
From dismantling your furniture to packing, moving, then reassembling, and even unpacking and staging your new home, a good removal company will make your moving day safer and easier for you.
However, choosing the right removal company is no easy task either so we have created a step-by-step guide to finding the best movers for your move.
Be sure to visit our home moving blog where you will find invaluable guides to packing every room in your home, guides on every home moving task you can think of, as well as many time and money saving tips.
*At RemovalReviews we will connect you with a professional moving company. Please note that we may not be affiliated with
and you may be speaking with another licensed provider.
Best removals nearby
We use cookies to optimise your experience.Accept and close or Learn more


Share your thoughts by leaving a comment